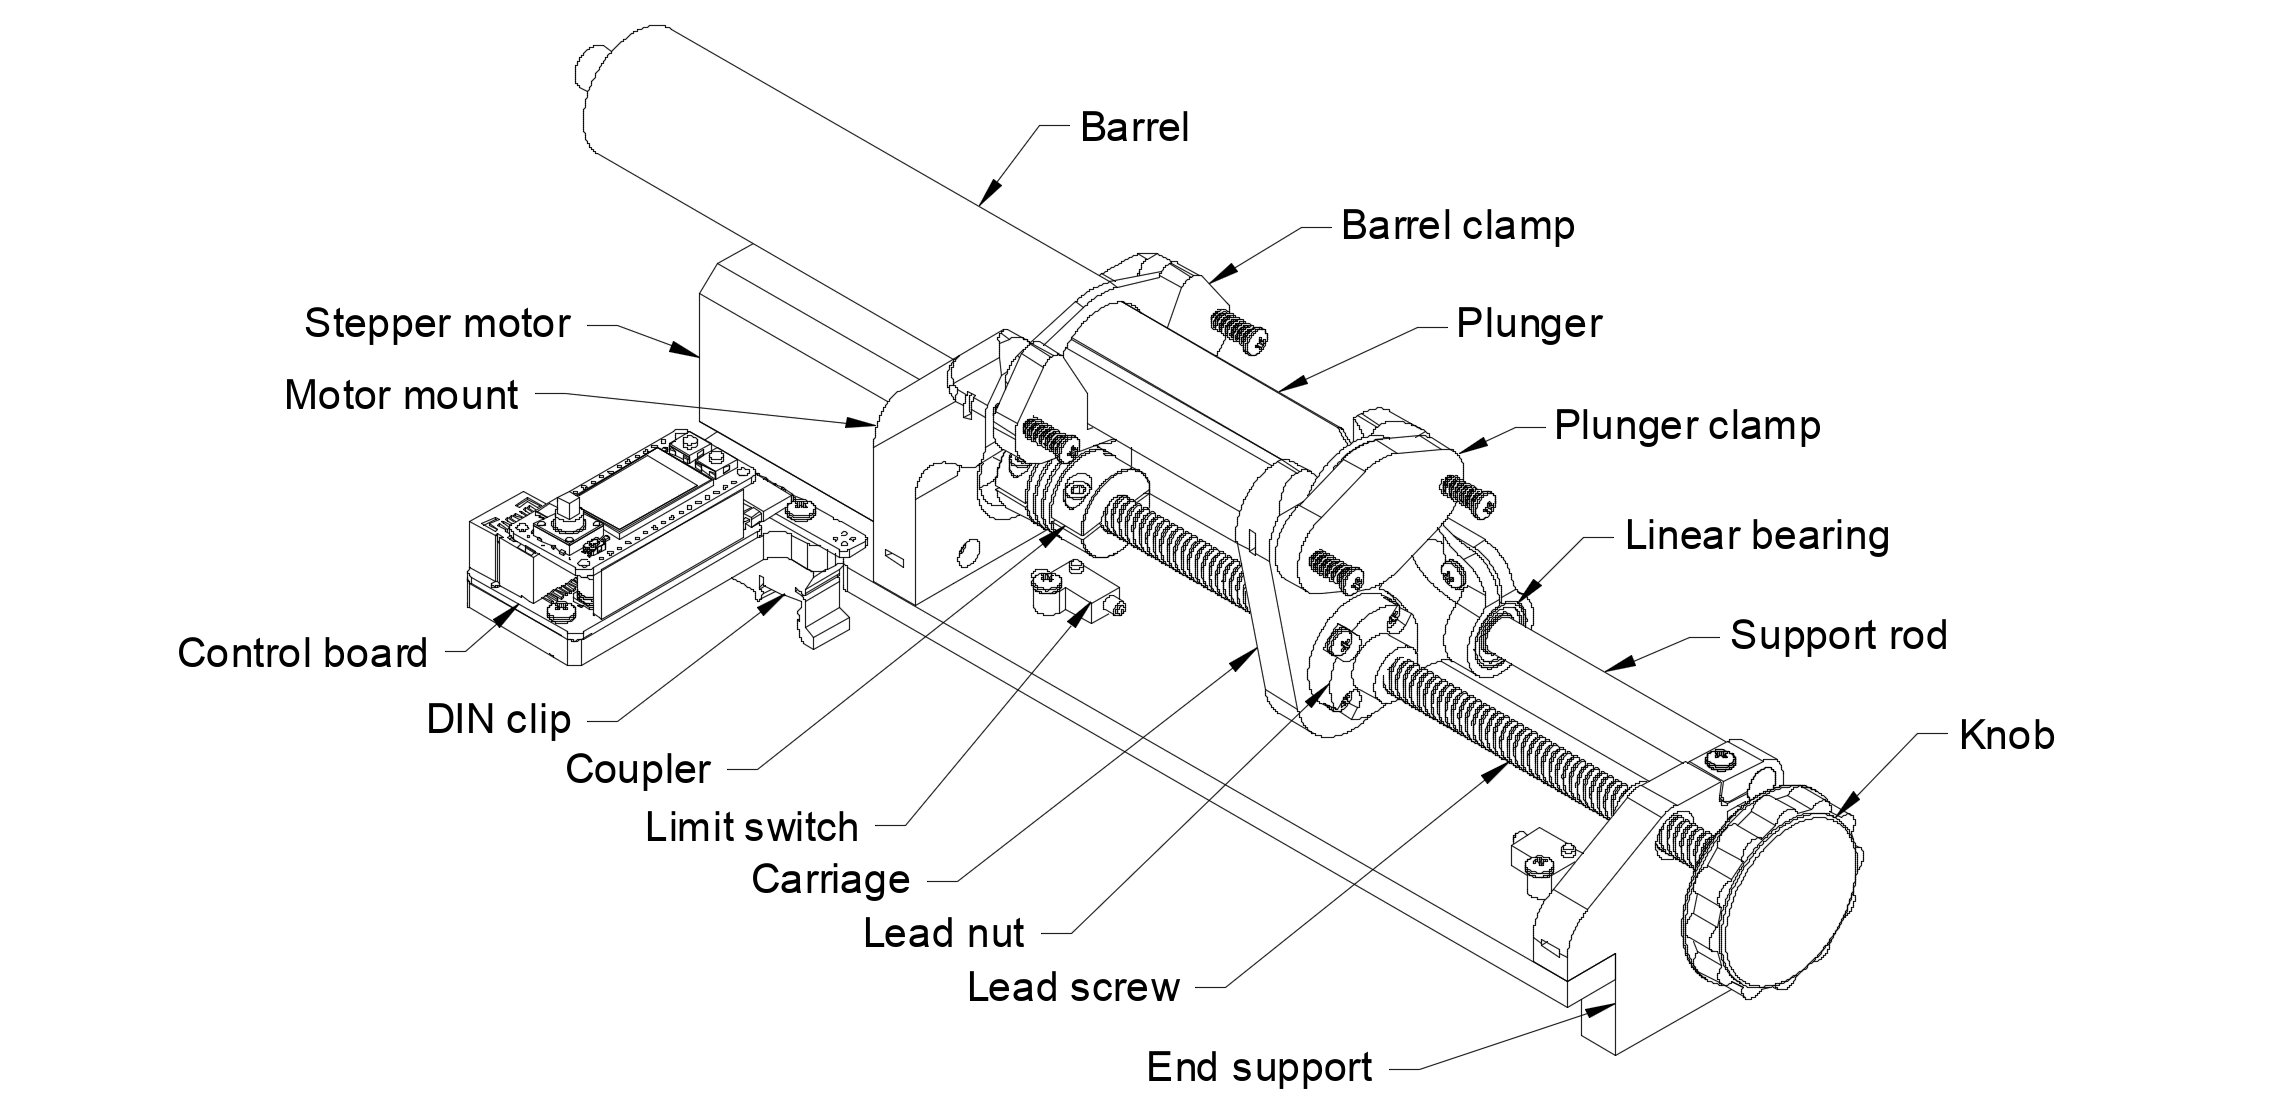
Mechanics#
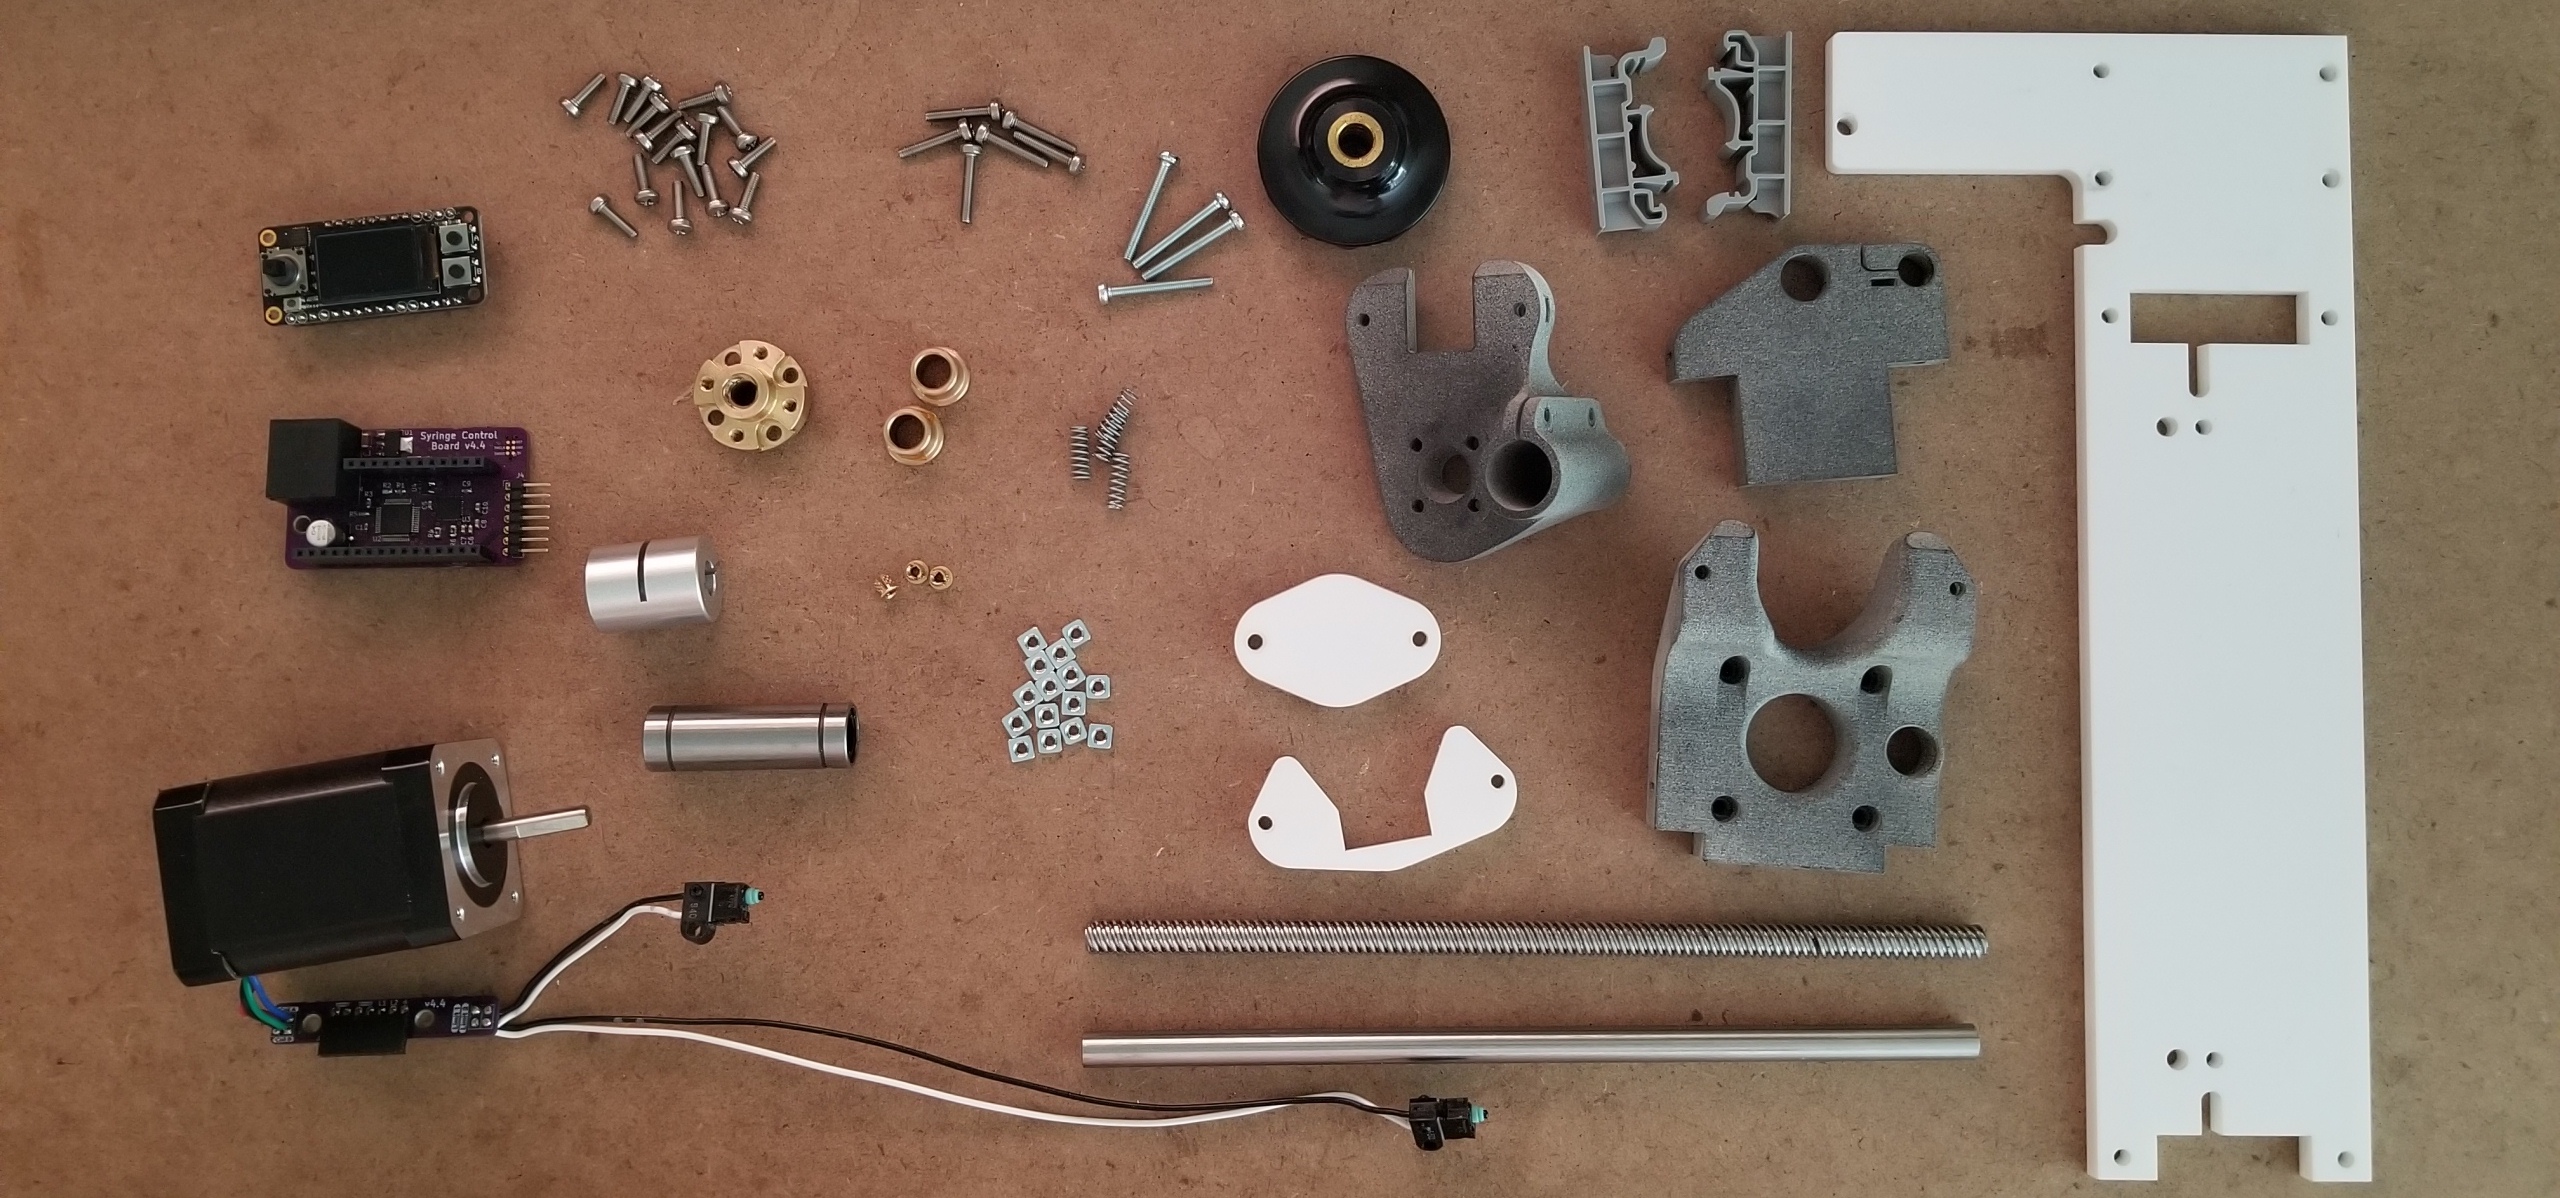
Hardware BOM#
| QTY | Description | Part Number | Supplier |
|---|---|---|---|
| 4 | M3 x 25mm machine screw | 92005A130 | McMaster-Carr |
| 6 | M3 x 16mm machine screw | 92005A126 | McMaster-Carr |
| 16 | M3 x 10mm machine screw | 92000A120 | McMaster-Carr |
| 15 | M3 thin square nut | 97259A101 | McMaster-Carr |
| 3 | M3 threaded insert | 94510A240 | McMaster-Carr |
| 4 | Spring | 9657K267 | McMaster-Carr |
| 2 | Flanged sleeve bearing | 5448T2 | McMaster-Carr |
| 1 | Knob | 6479K78 | McMaster-Carr |
| 1 | 200 x 8mm lead screw | 3501-0804-0200 | goBILDA |
| 1 | 8mm lead screw nut | 3505-0804-3216 | goBILDA |
| 1 | 200 x 8 mm shaft | 2100-0008-0200 | goBILDA |
| 1 | Linear ball bearing | 1612-0815-0045 | goBILDA |
| 1 | 5 mm to 8 mm coupler | 4002-0005-0008 | goBILDA |
| 2 | Limit switch | 255-5122-ND | Digi-Key |
| 2 | DIN clip | 277-2296-ND | Digi-Key |
| 1 | Nema 17 bipolar 60Ncm 200steps | 17HS24-0644S | STEPPERONLINE |
Laser cut parts#
2D cutting services
I've gotten good results using laser cutter / waterjet services from Big Blue Saw, SendCutSend, and OSH Cut.
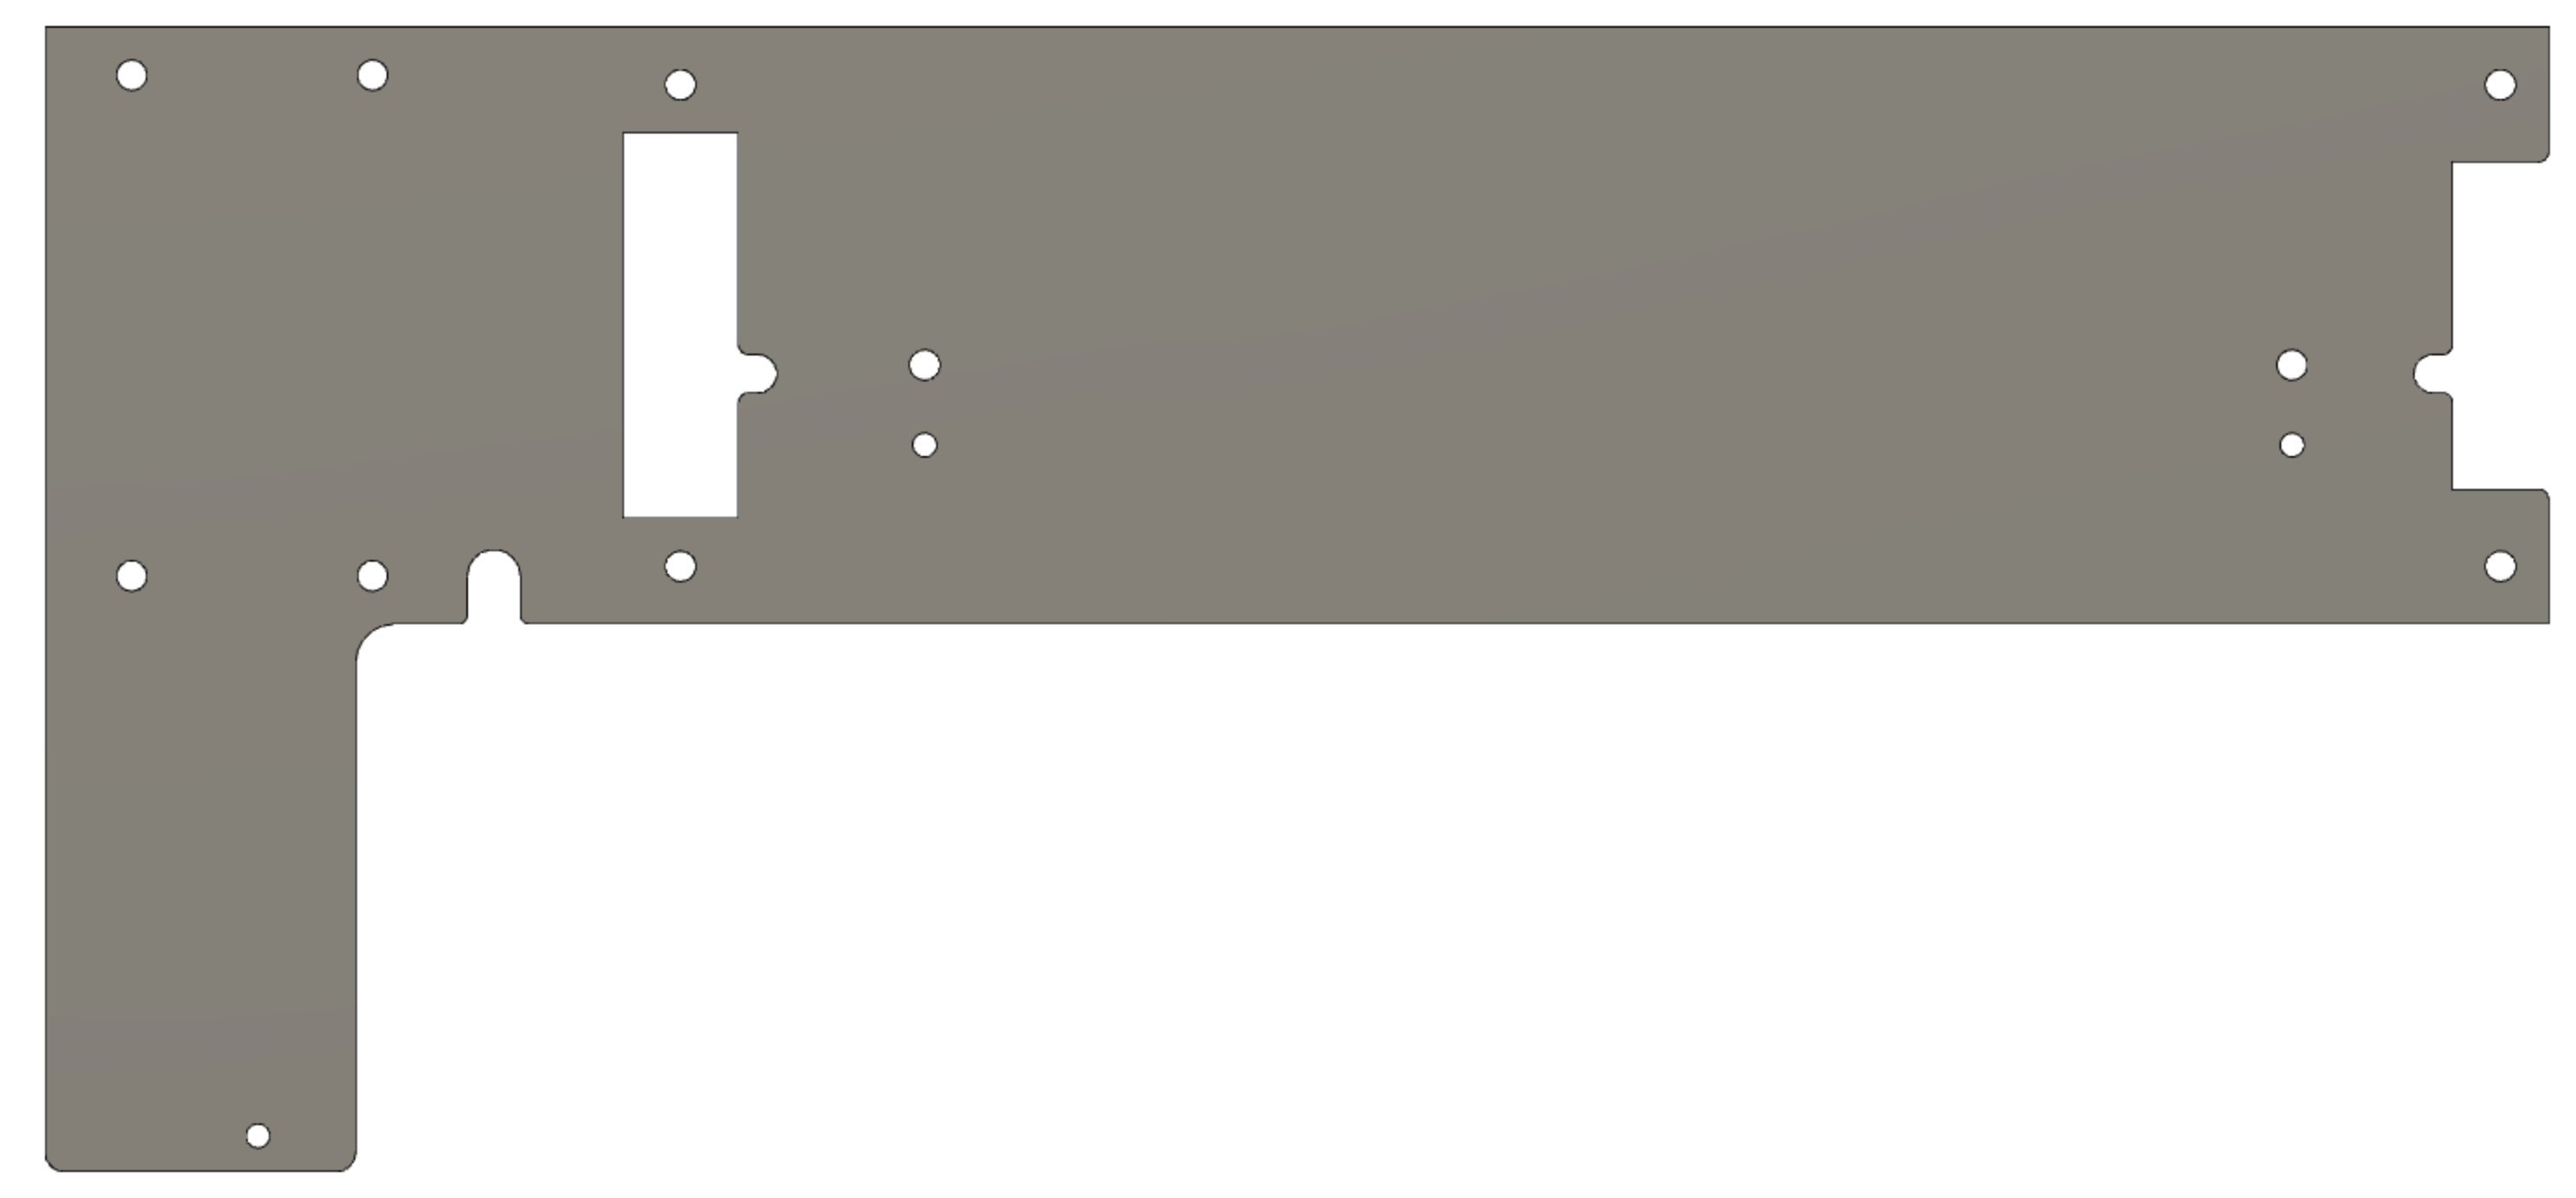
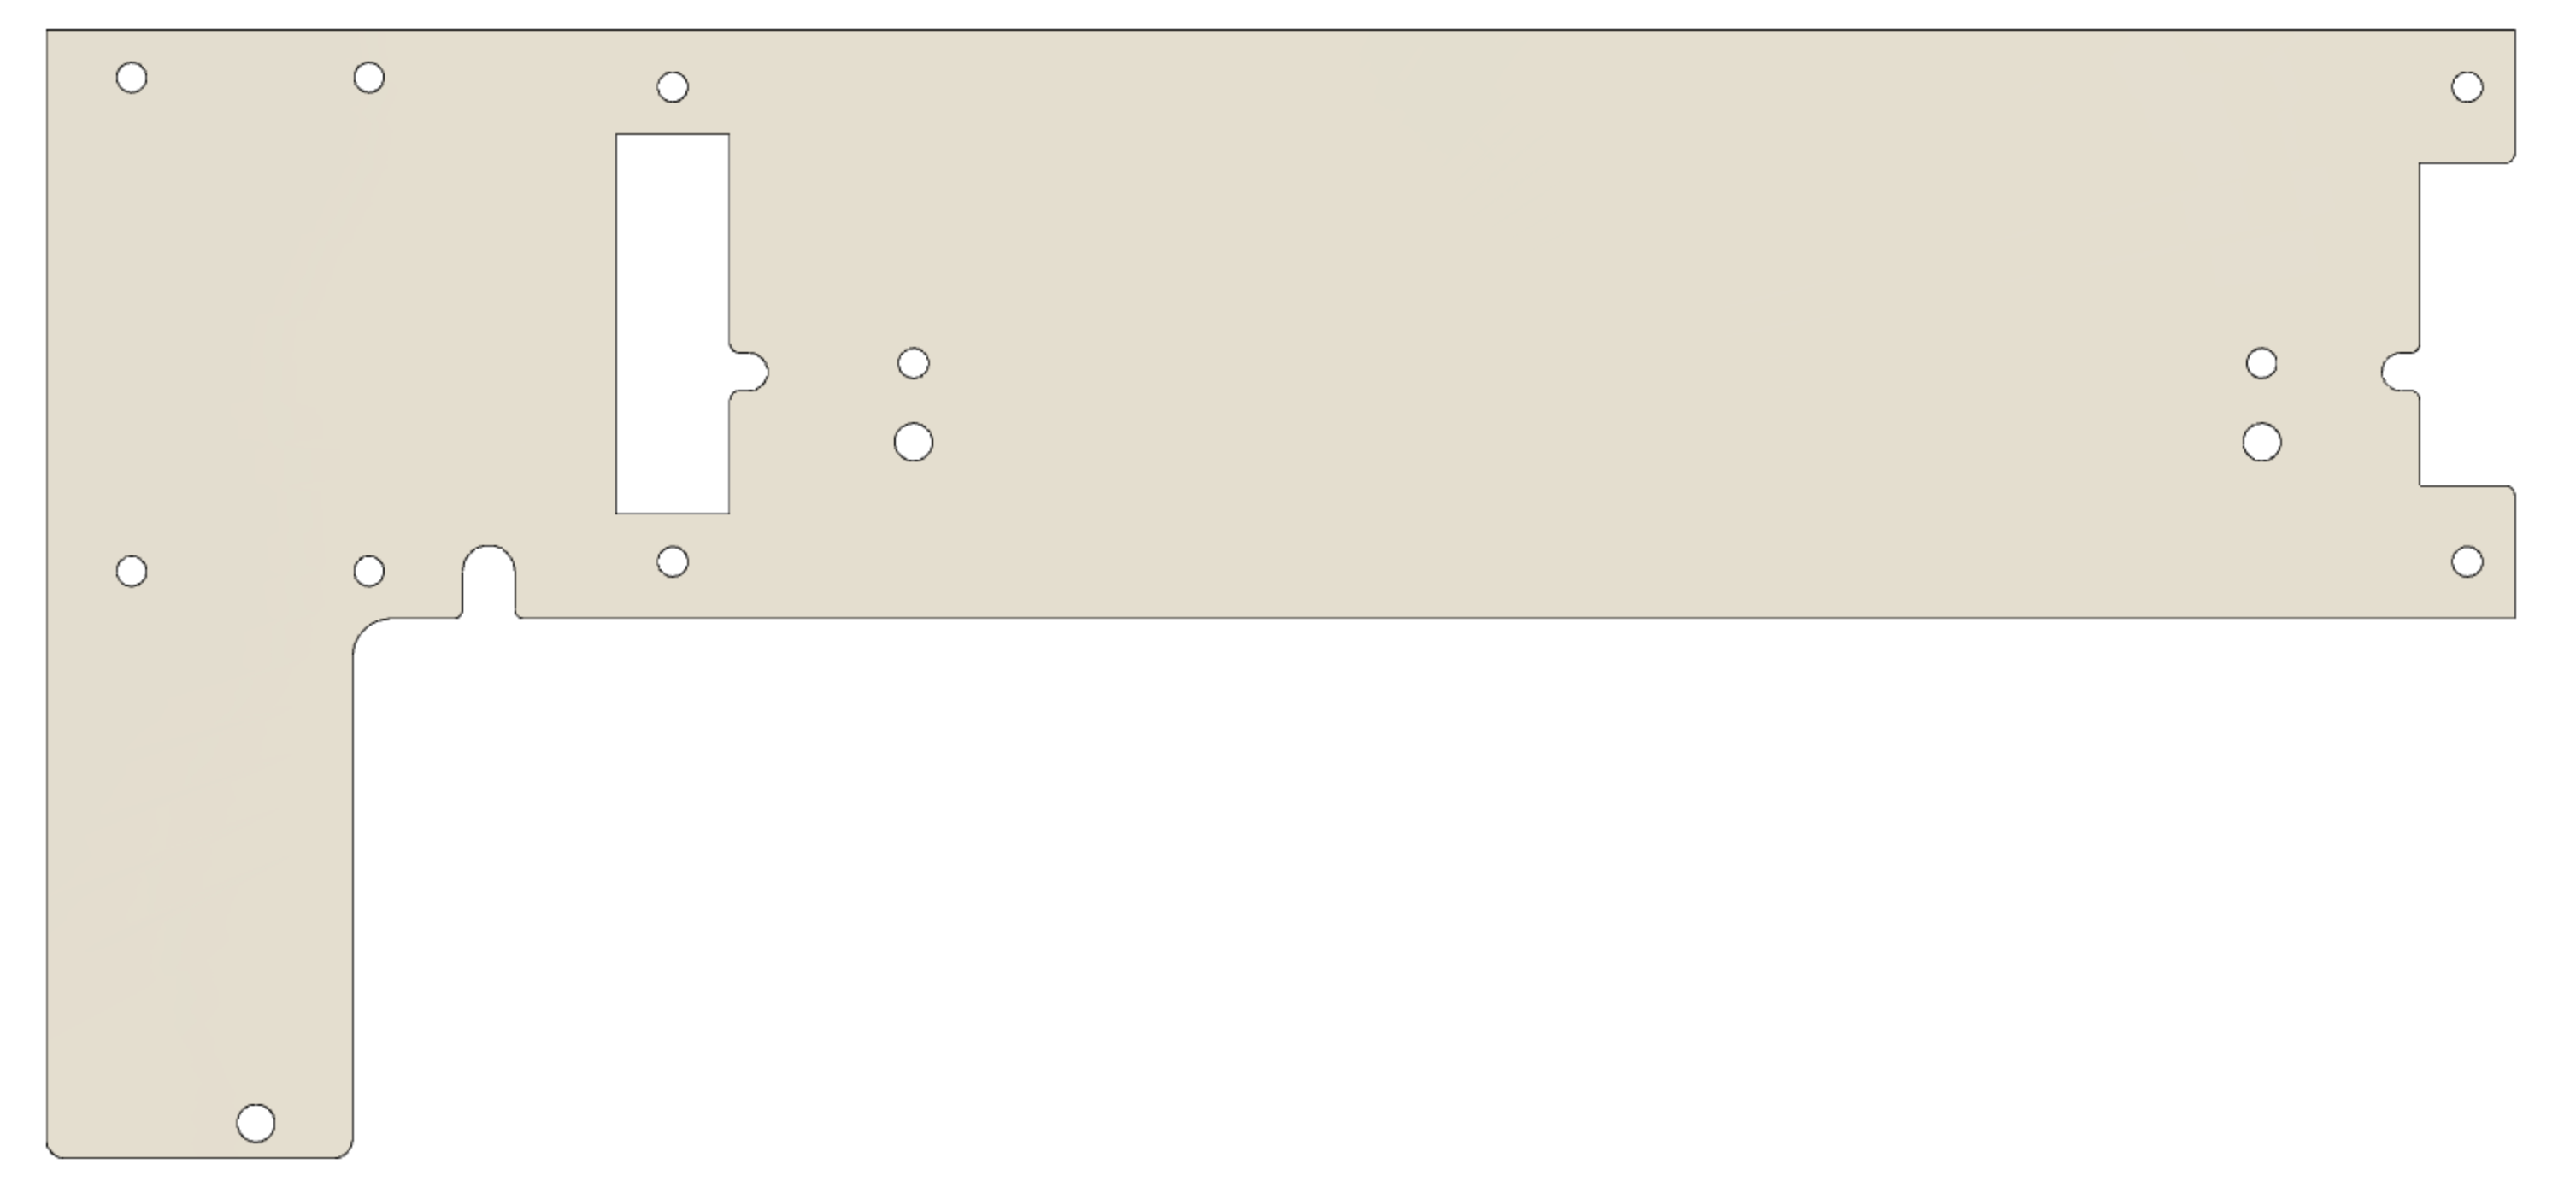
Base#
The base can be cut out of aluminum or acrylic. Acrylic is a faster and cheaper option if you are using your own laser cutter. If you are outsourcing the laser cutting anyway, aluminum has the benefit of being stiffer for only a slightly higher cost.
- 3/16"(0.1875") aluminum
- 2.5 mm holes ready for M3x0.5 tap
Laser cutting/water jetting may offer tapped holes as a service for an added cost. You can also tap the holes yourself using an M3x0.5 tap.
- 1/4"(0.25") acrylic
- 4 mm holes for flanged M3 threaded inserts to be added
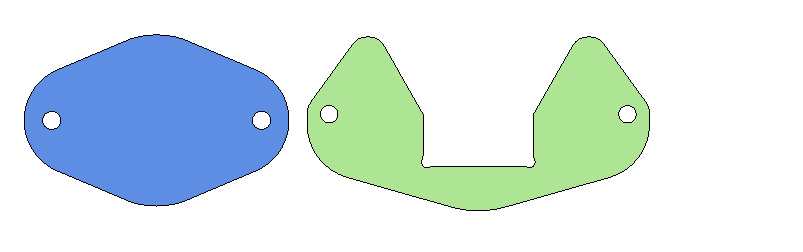
Clamps#
clamp_plunger.dxf and clamp_barrel.dxf (units are in mm)
- 1/4" acrylic
3D printed parts#
These components are printed in Nylon PA 12 using an HP Multi-Jet-Fusion printer.
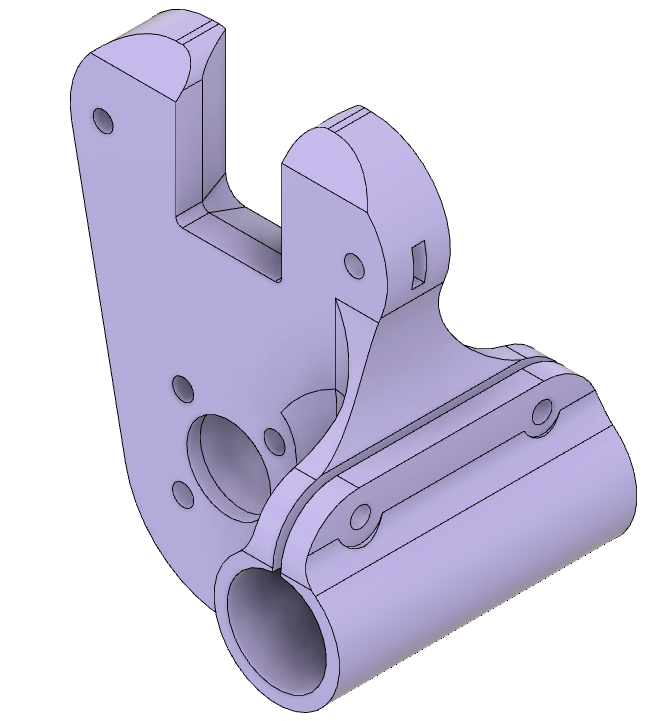
Cradle#
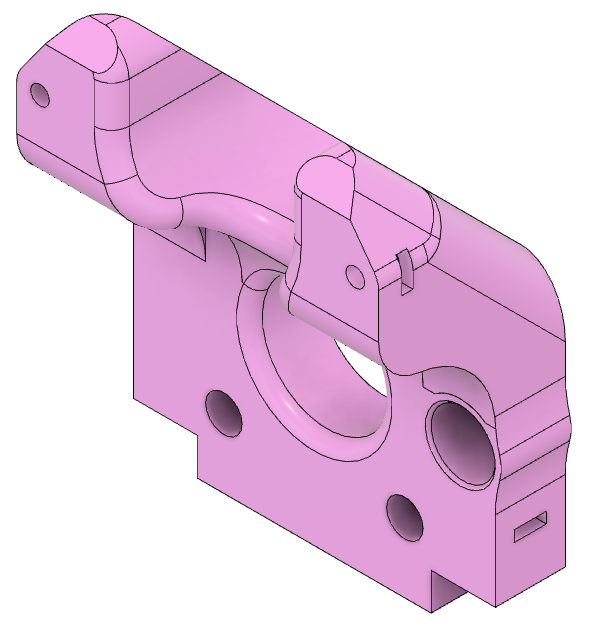
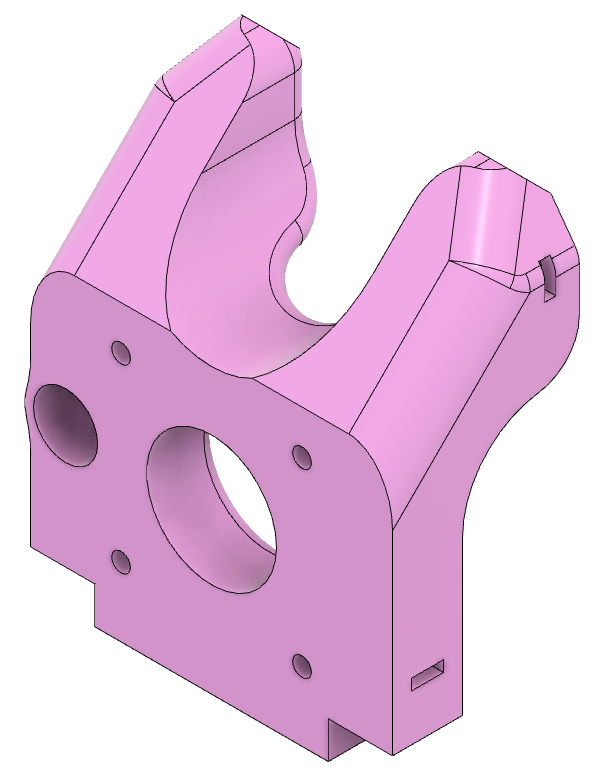
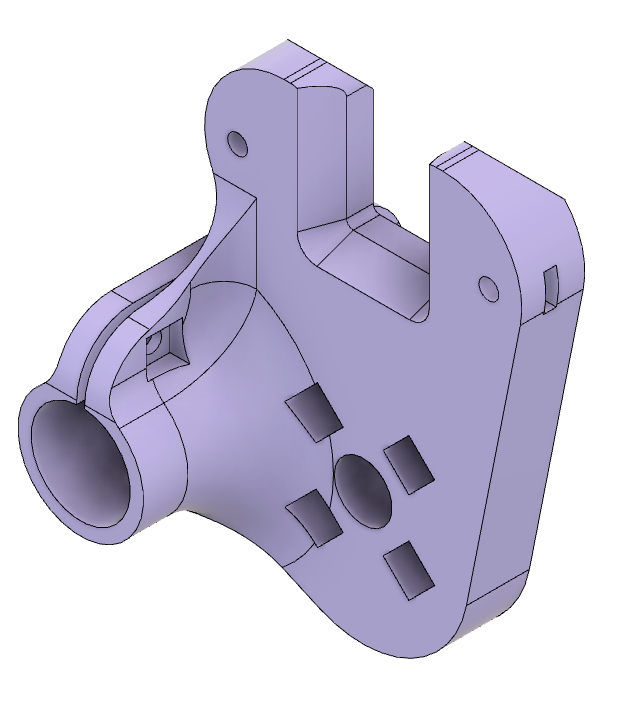
Carriage#
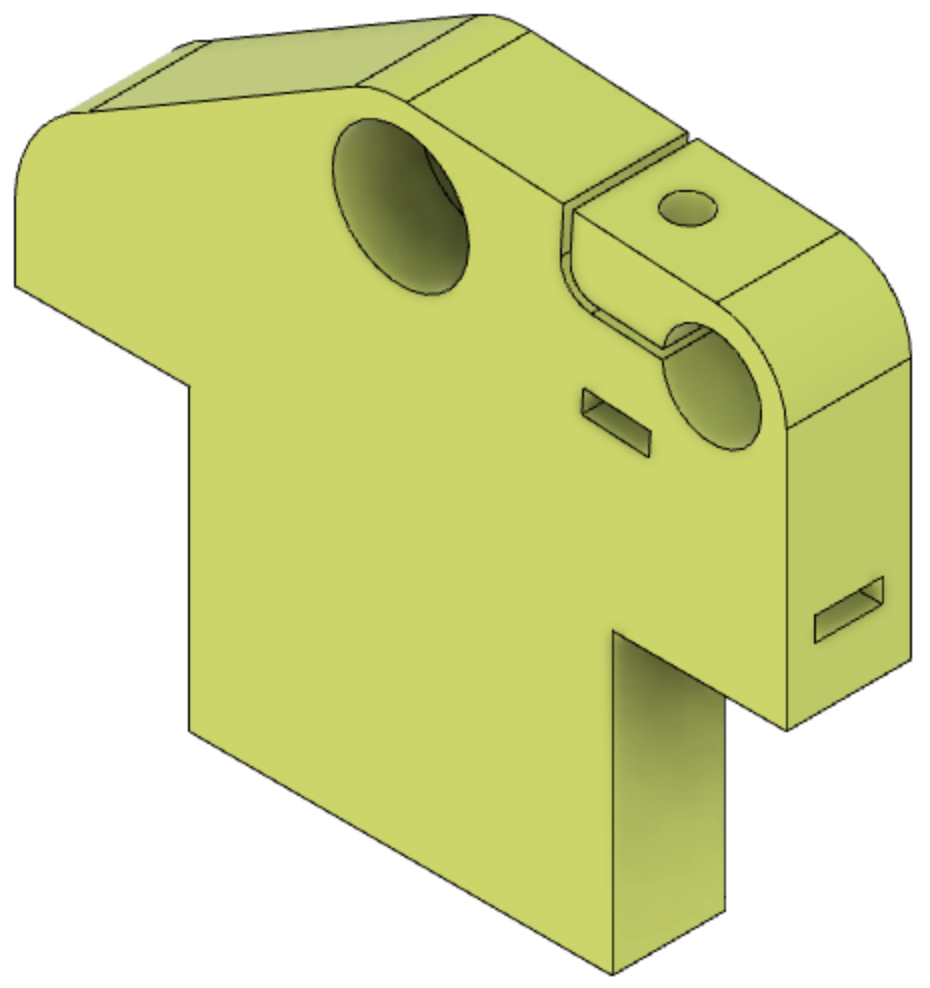
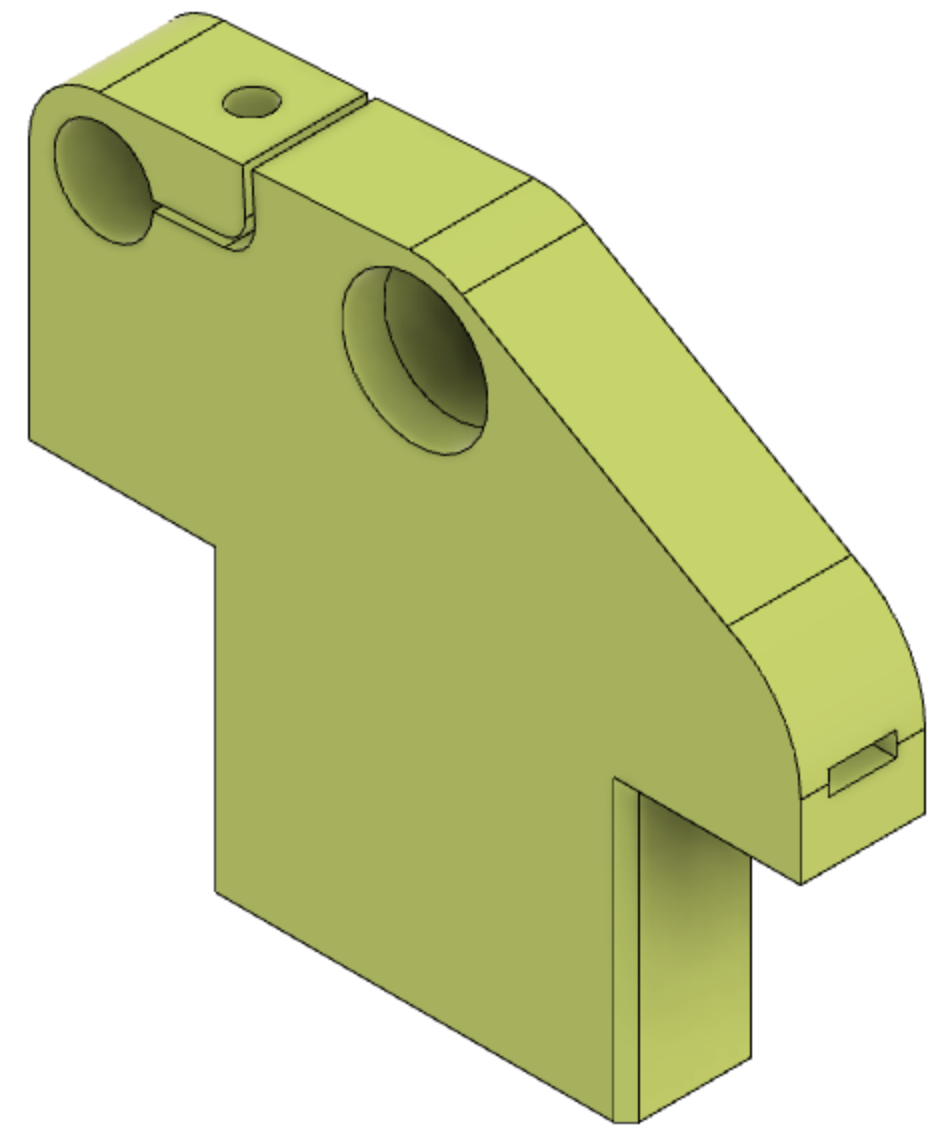
End Support#
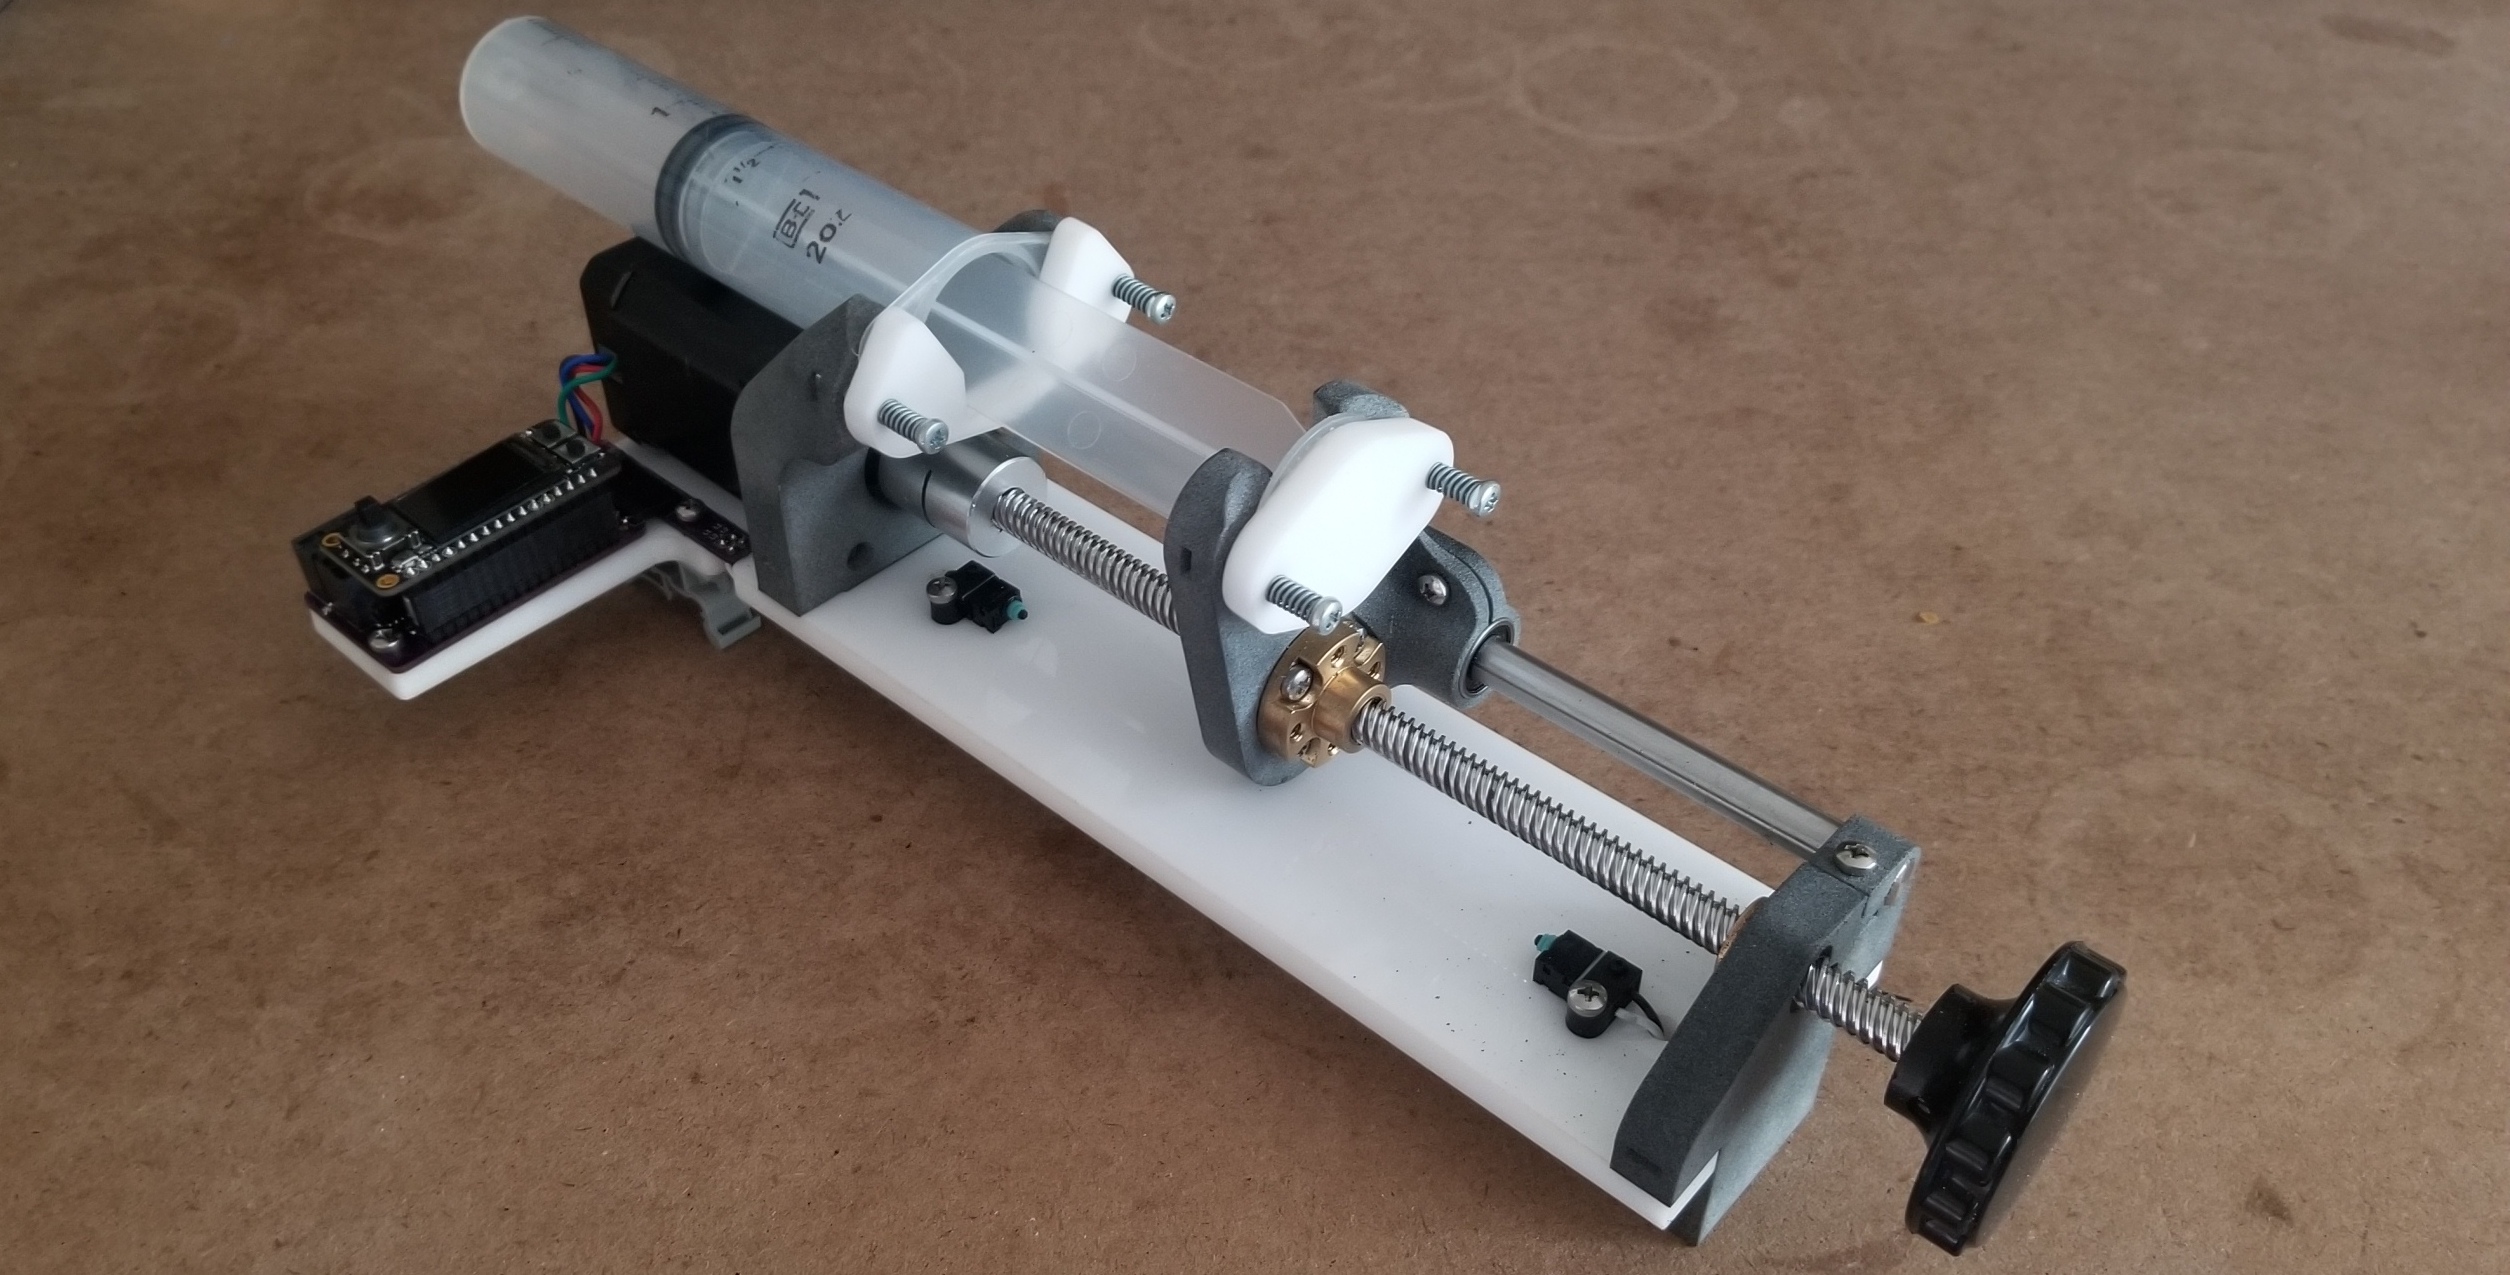
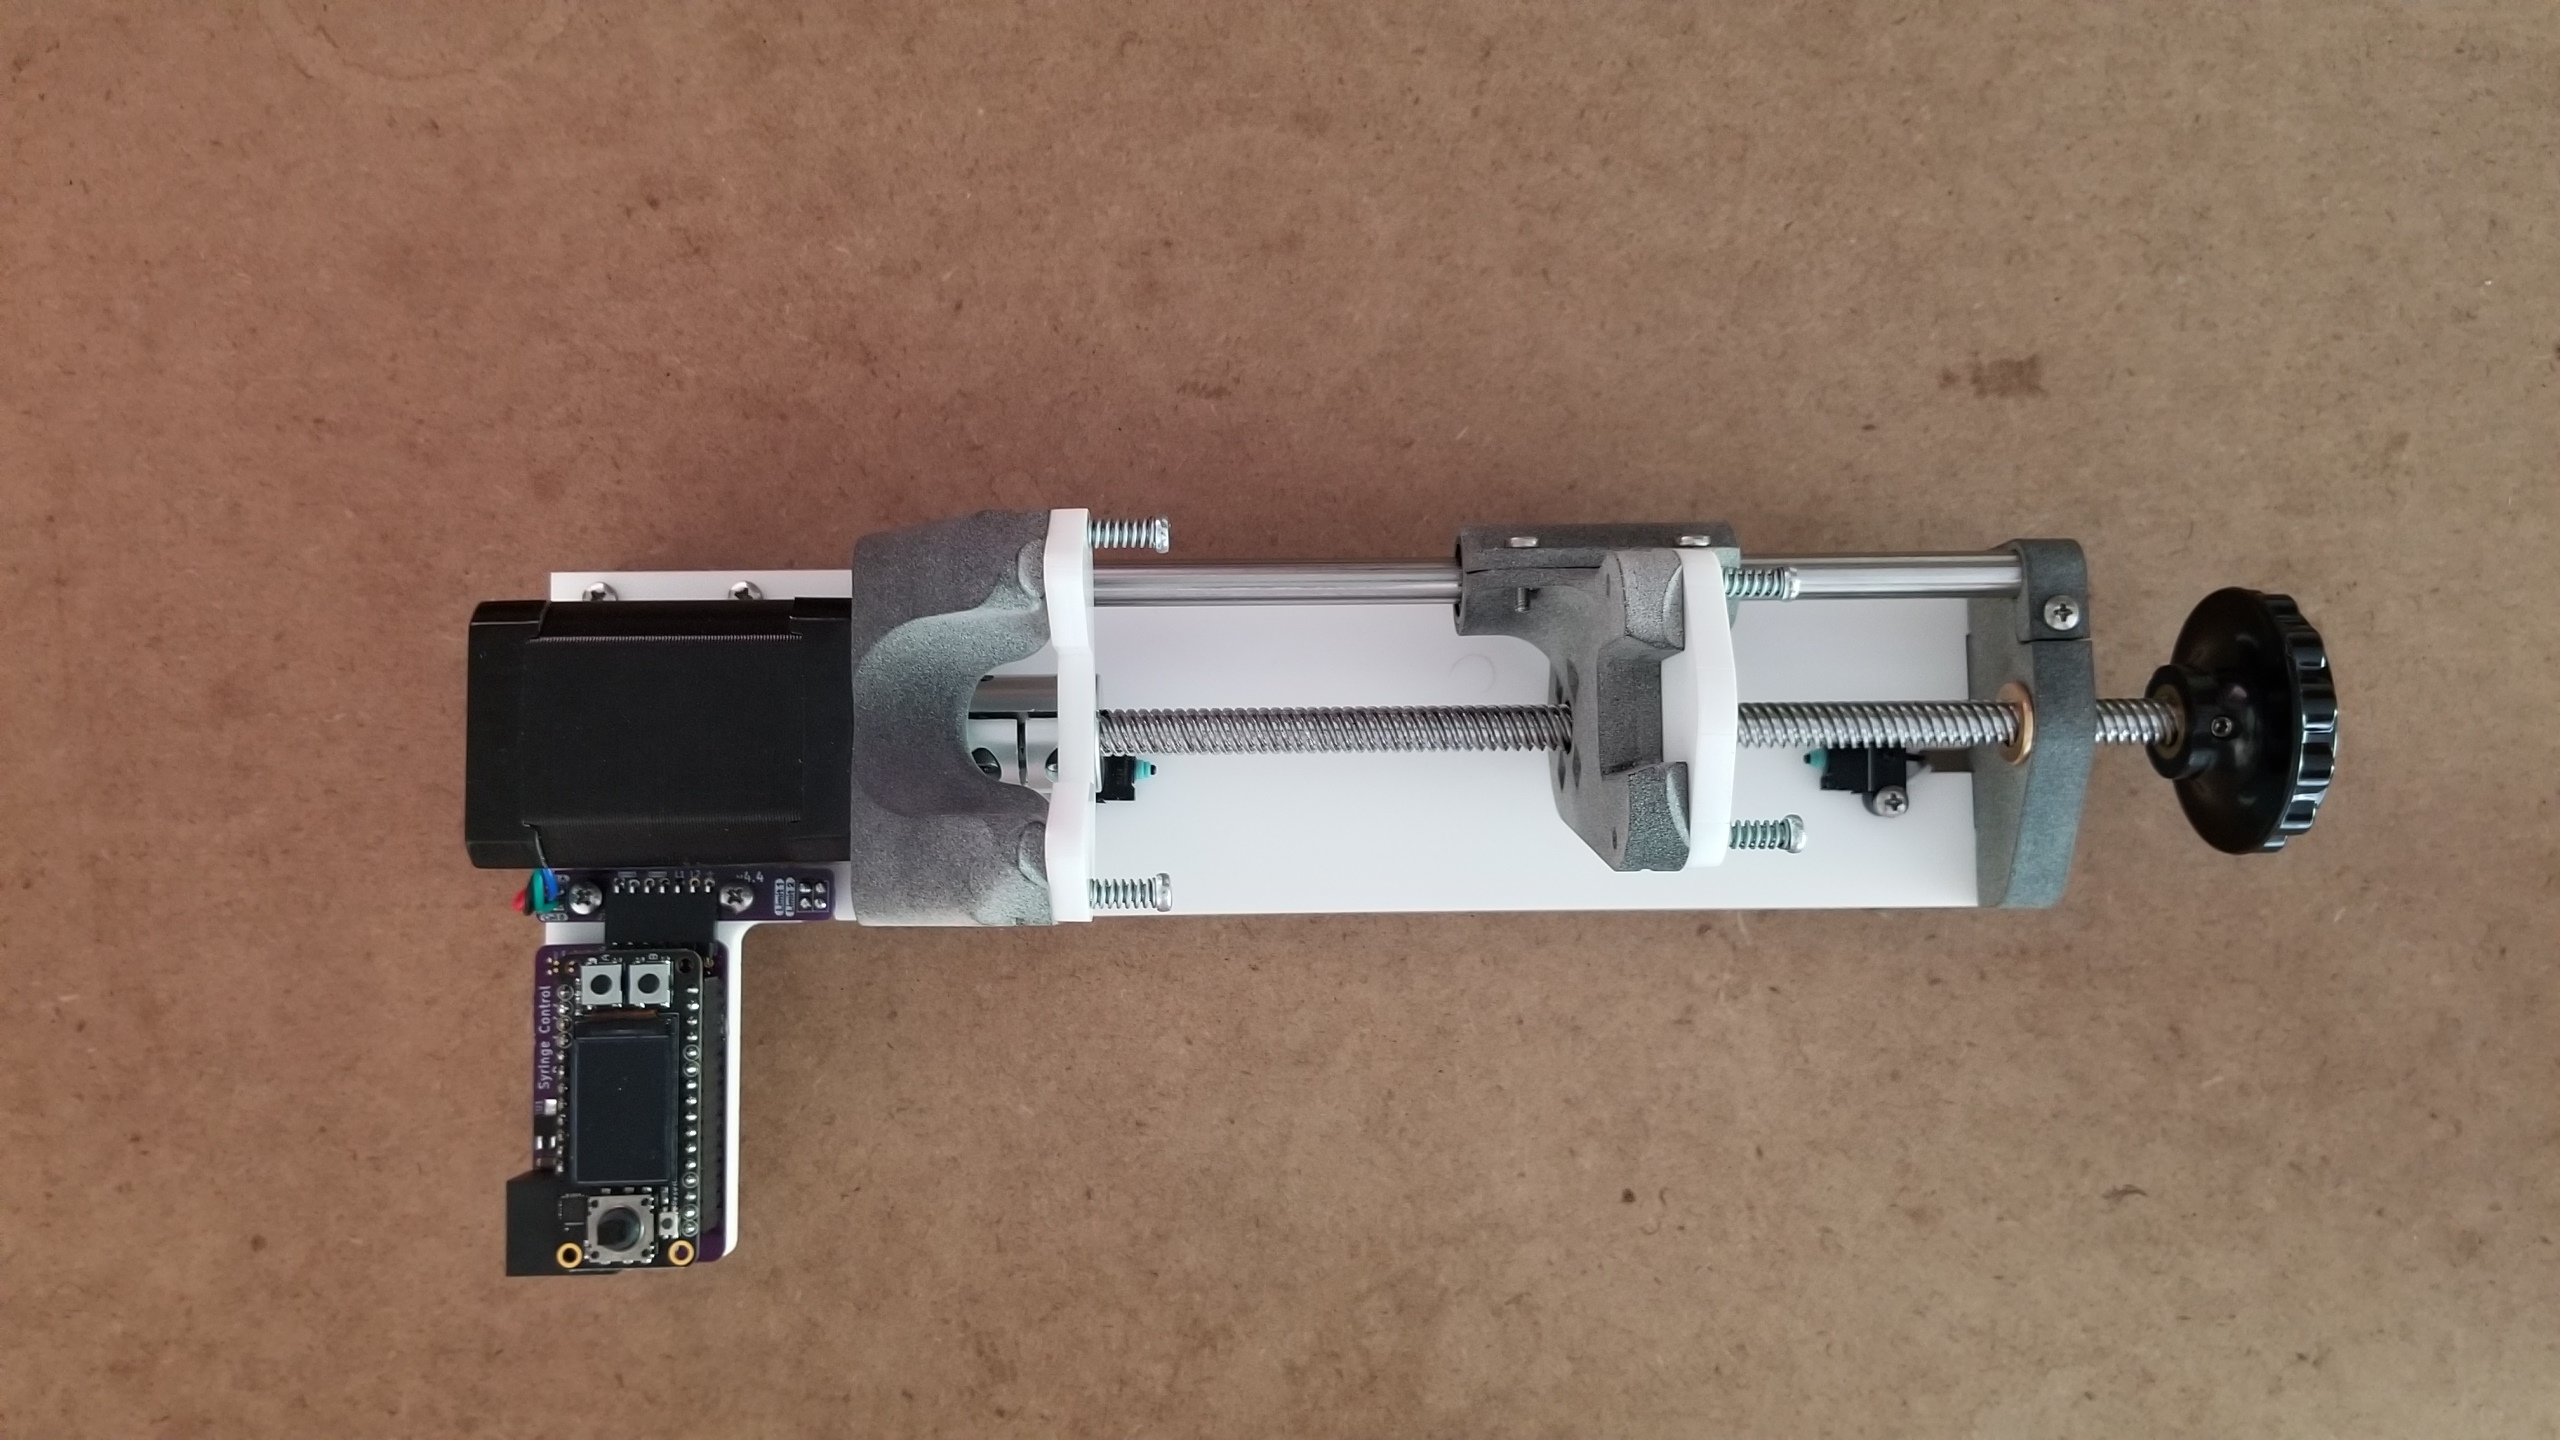
Assembly#
Video#
Tools#
- Phillips head screwdriver
- M2.5 mm allen key
- 5/64 allen key
Instructions#
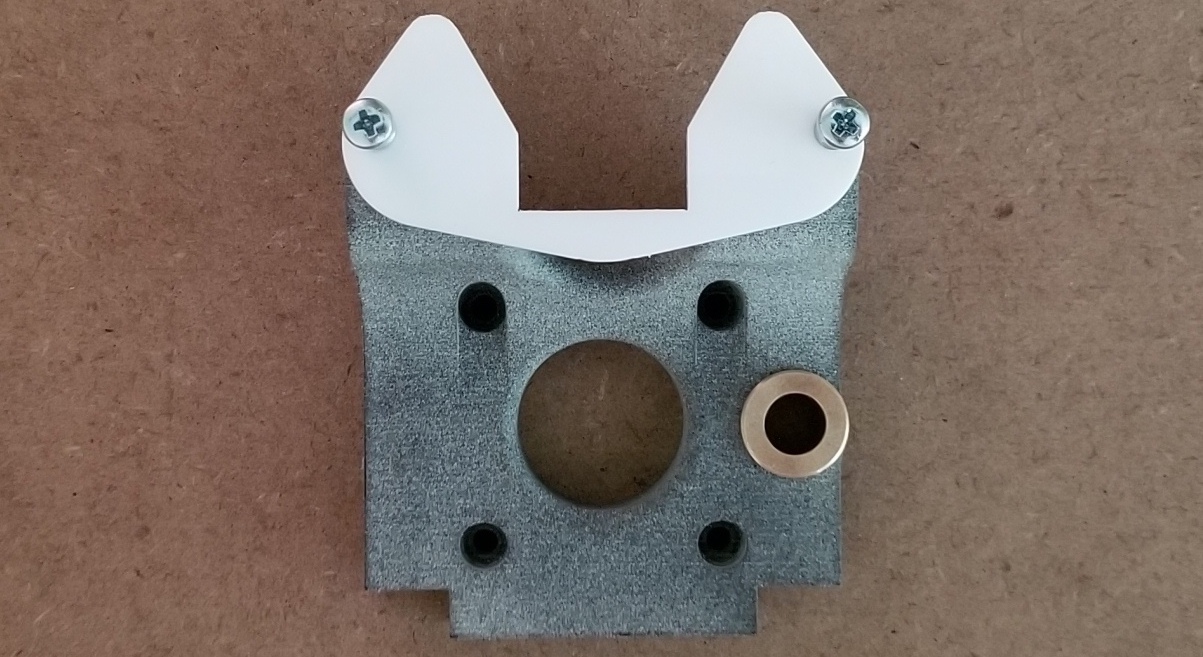
1. Assemble cradle#
- (2) M3x25mm screws
- (2) springs
- (2) square nuts
- (1) flanged sleeve bearing
- (1) laser cut acrylic clamp
- (1) 3d printed nylon cradle

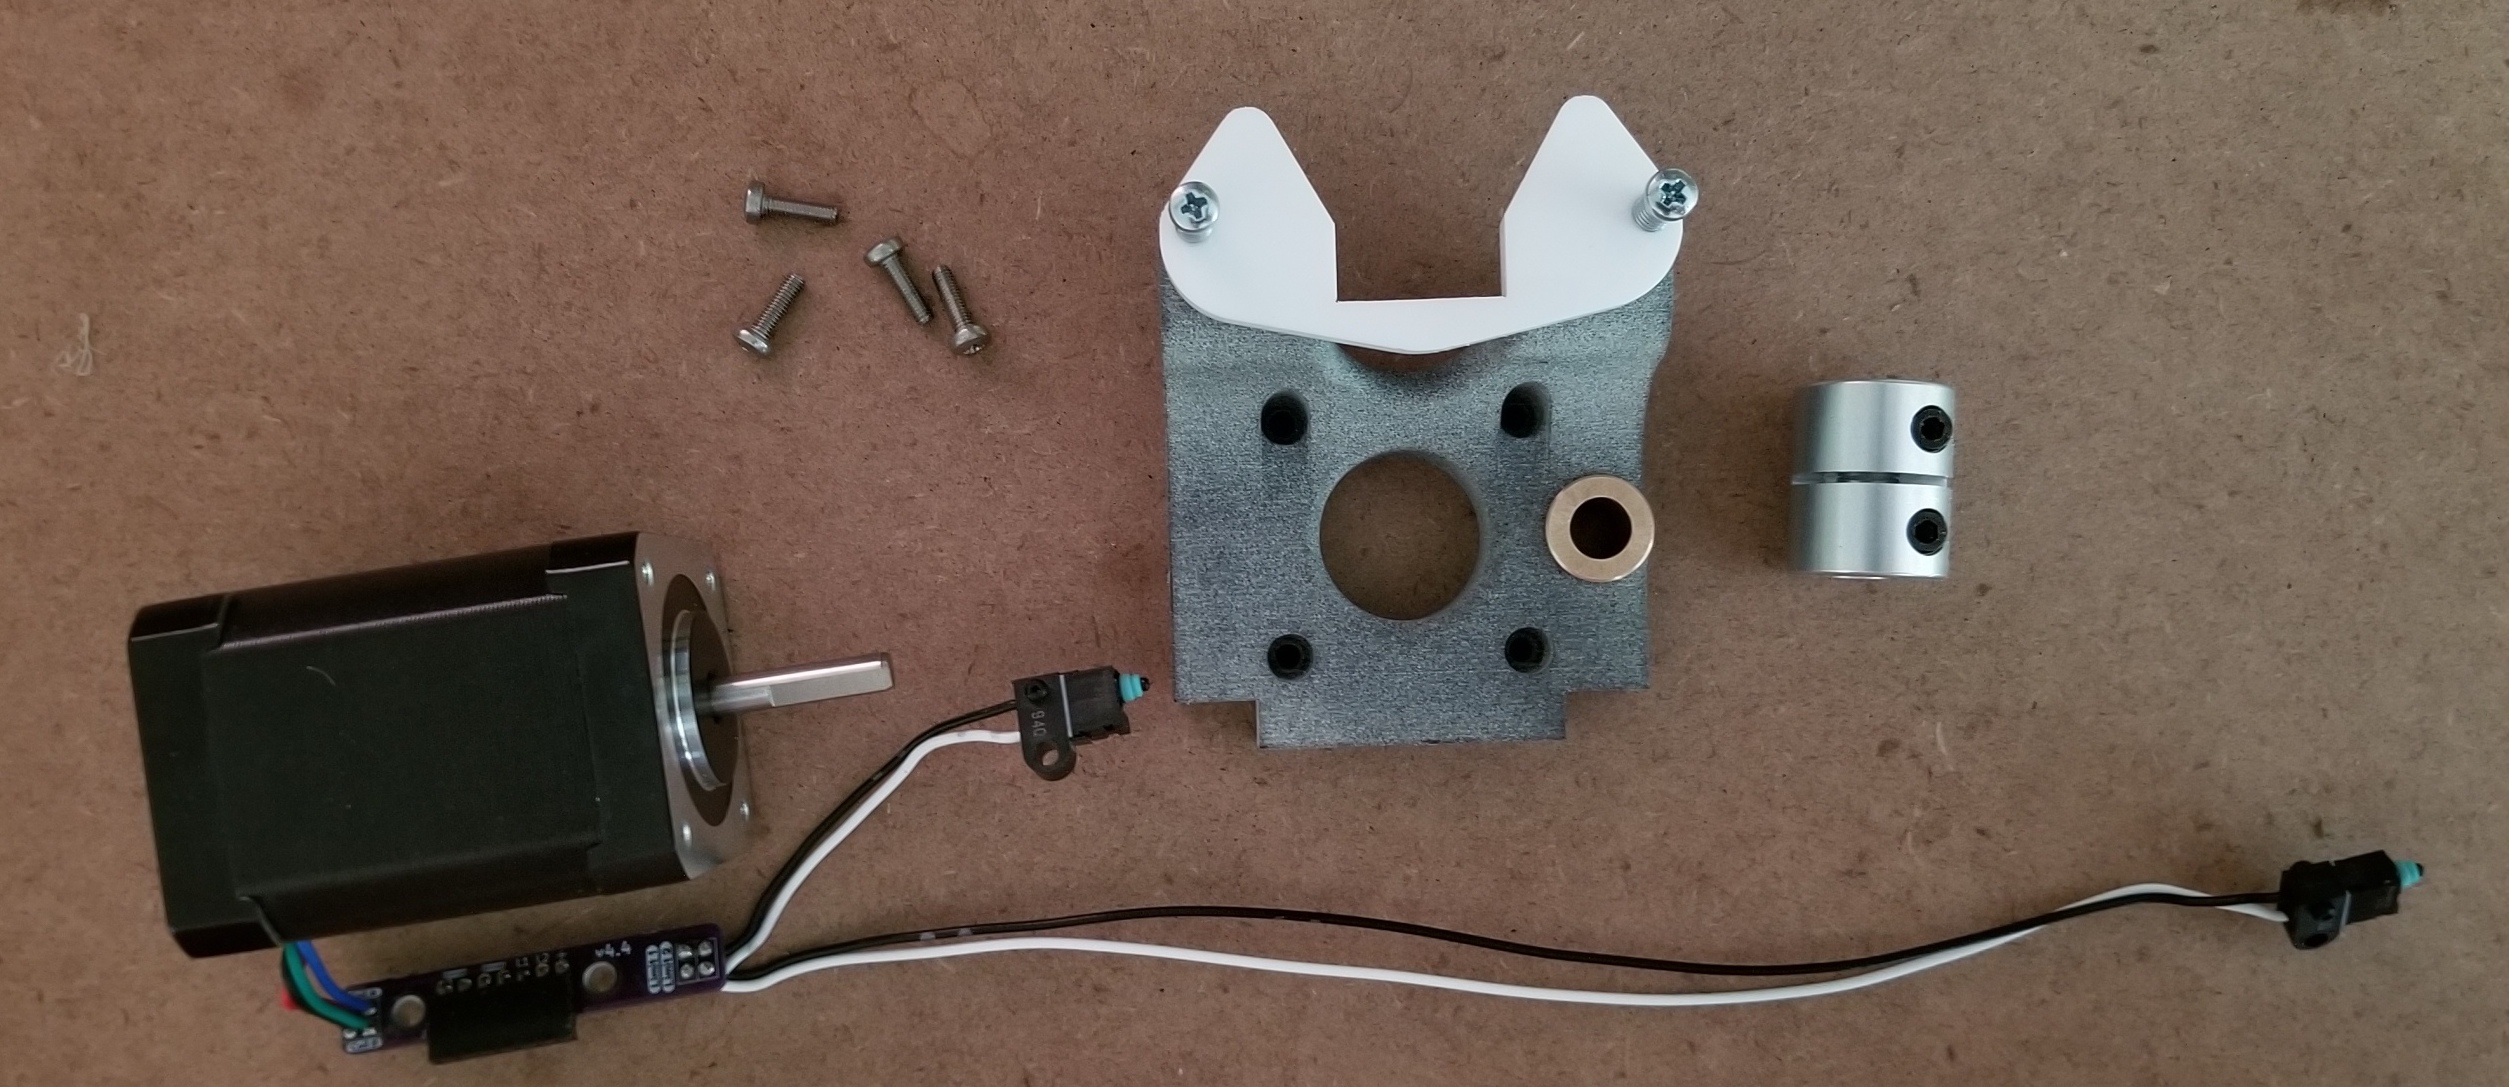
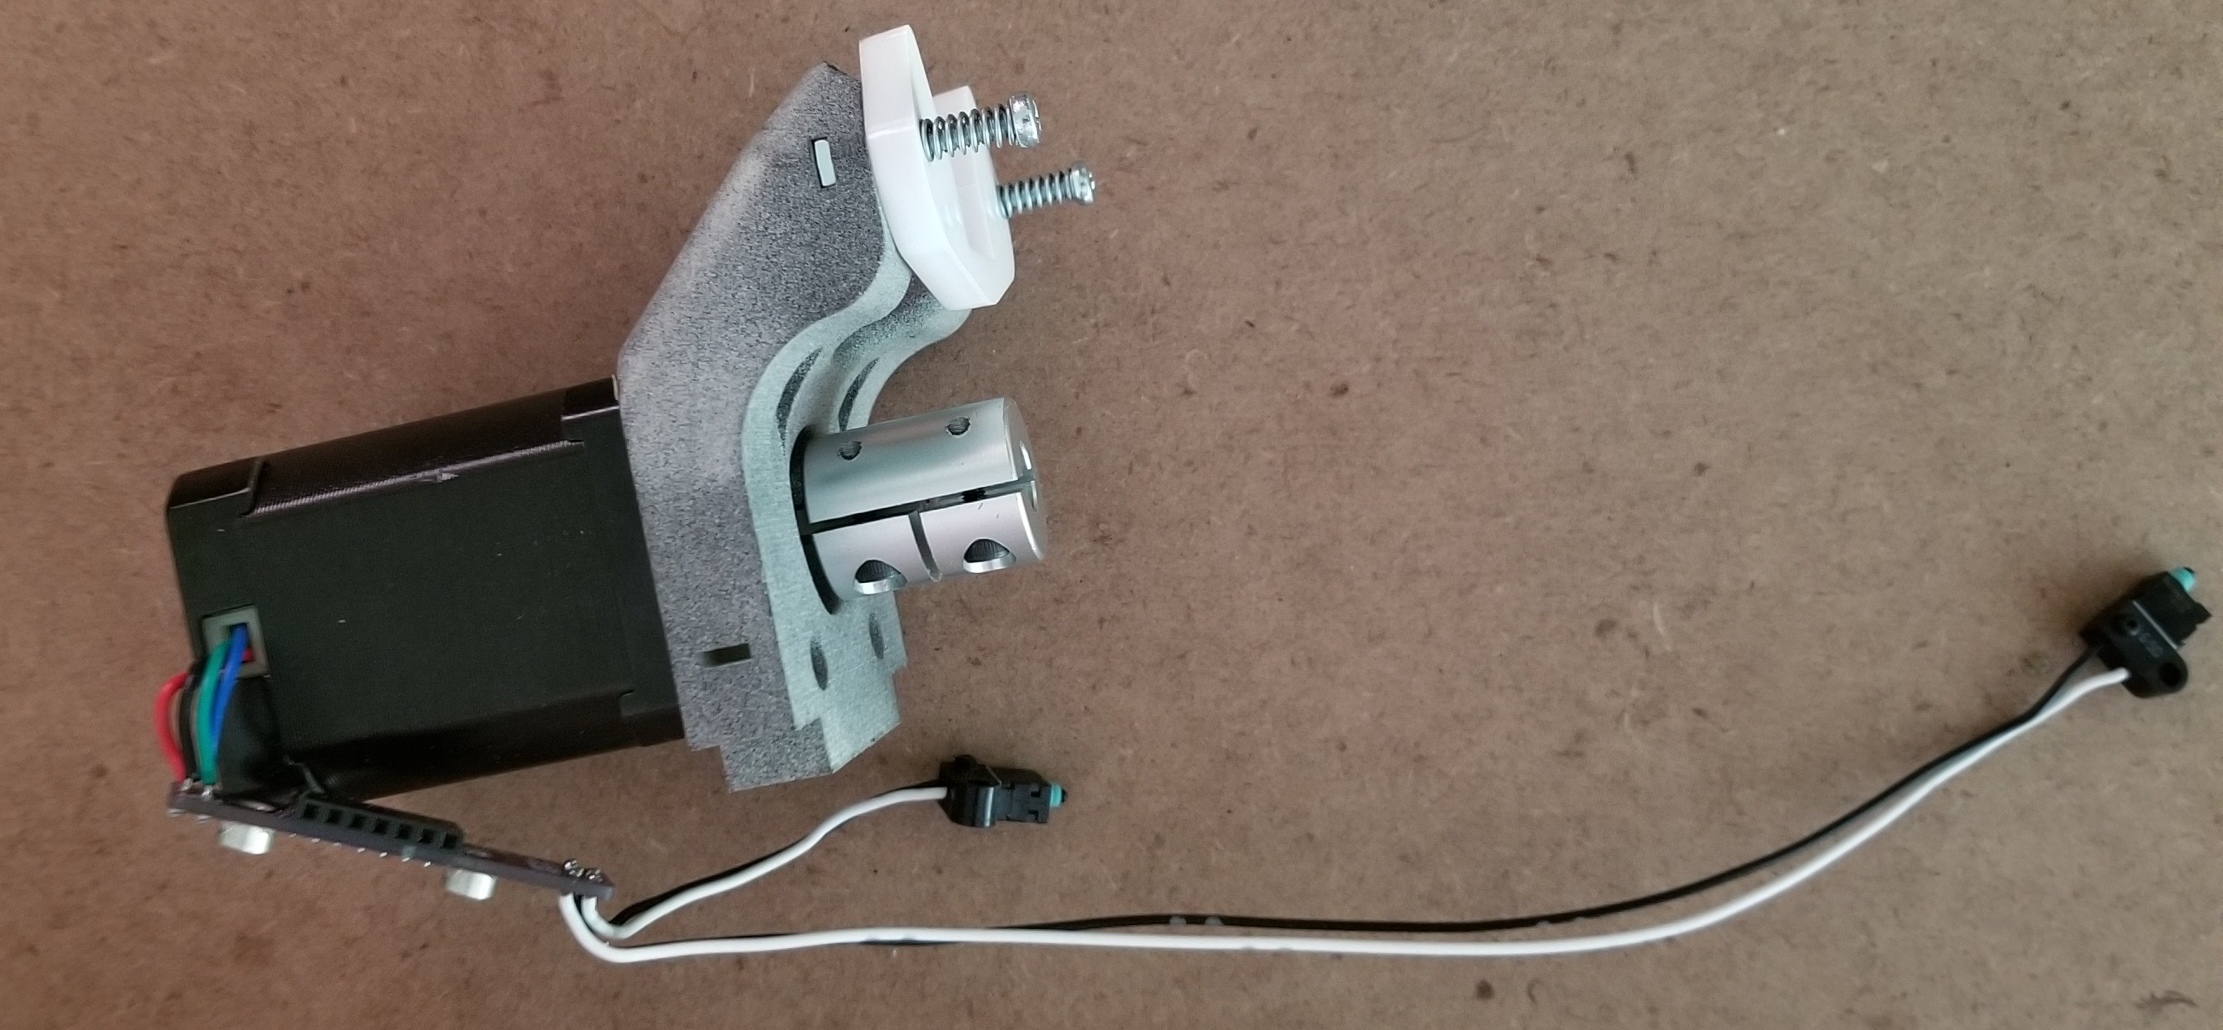
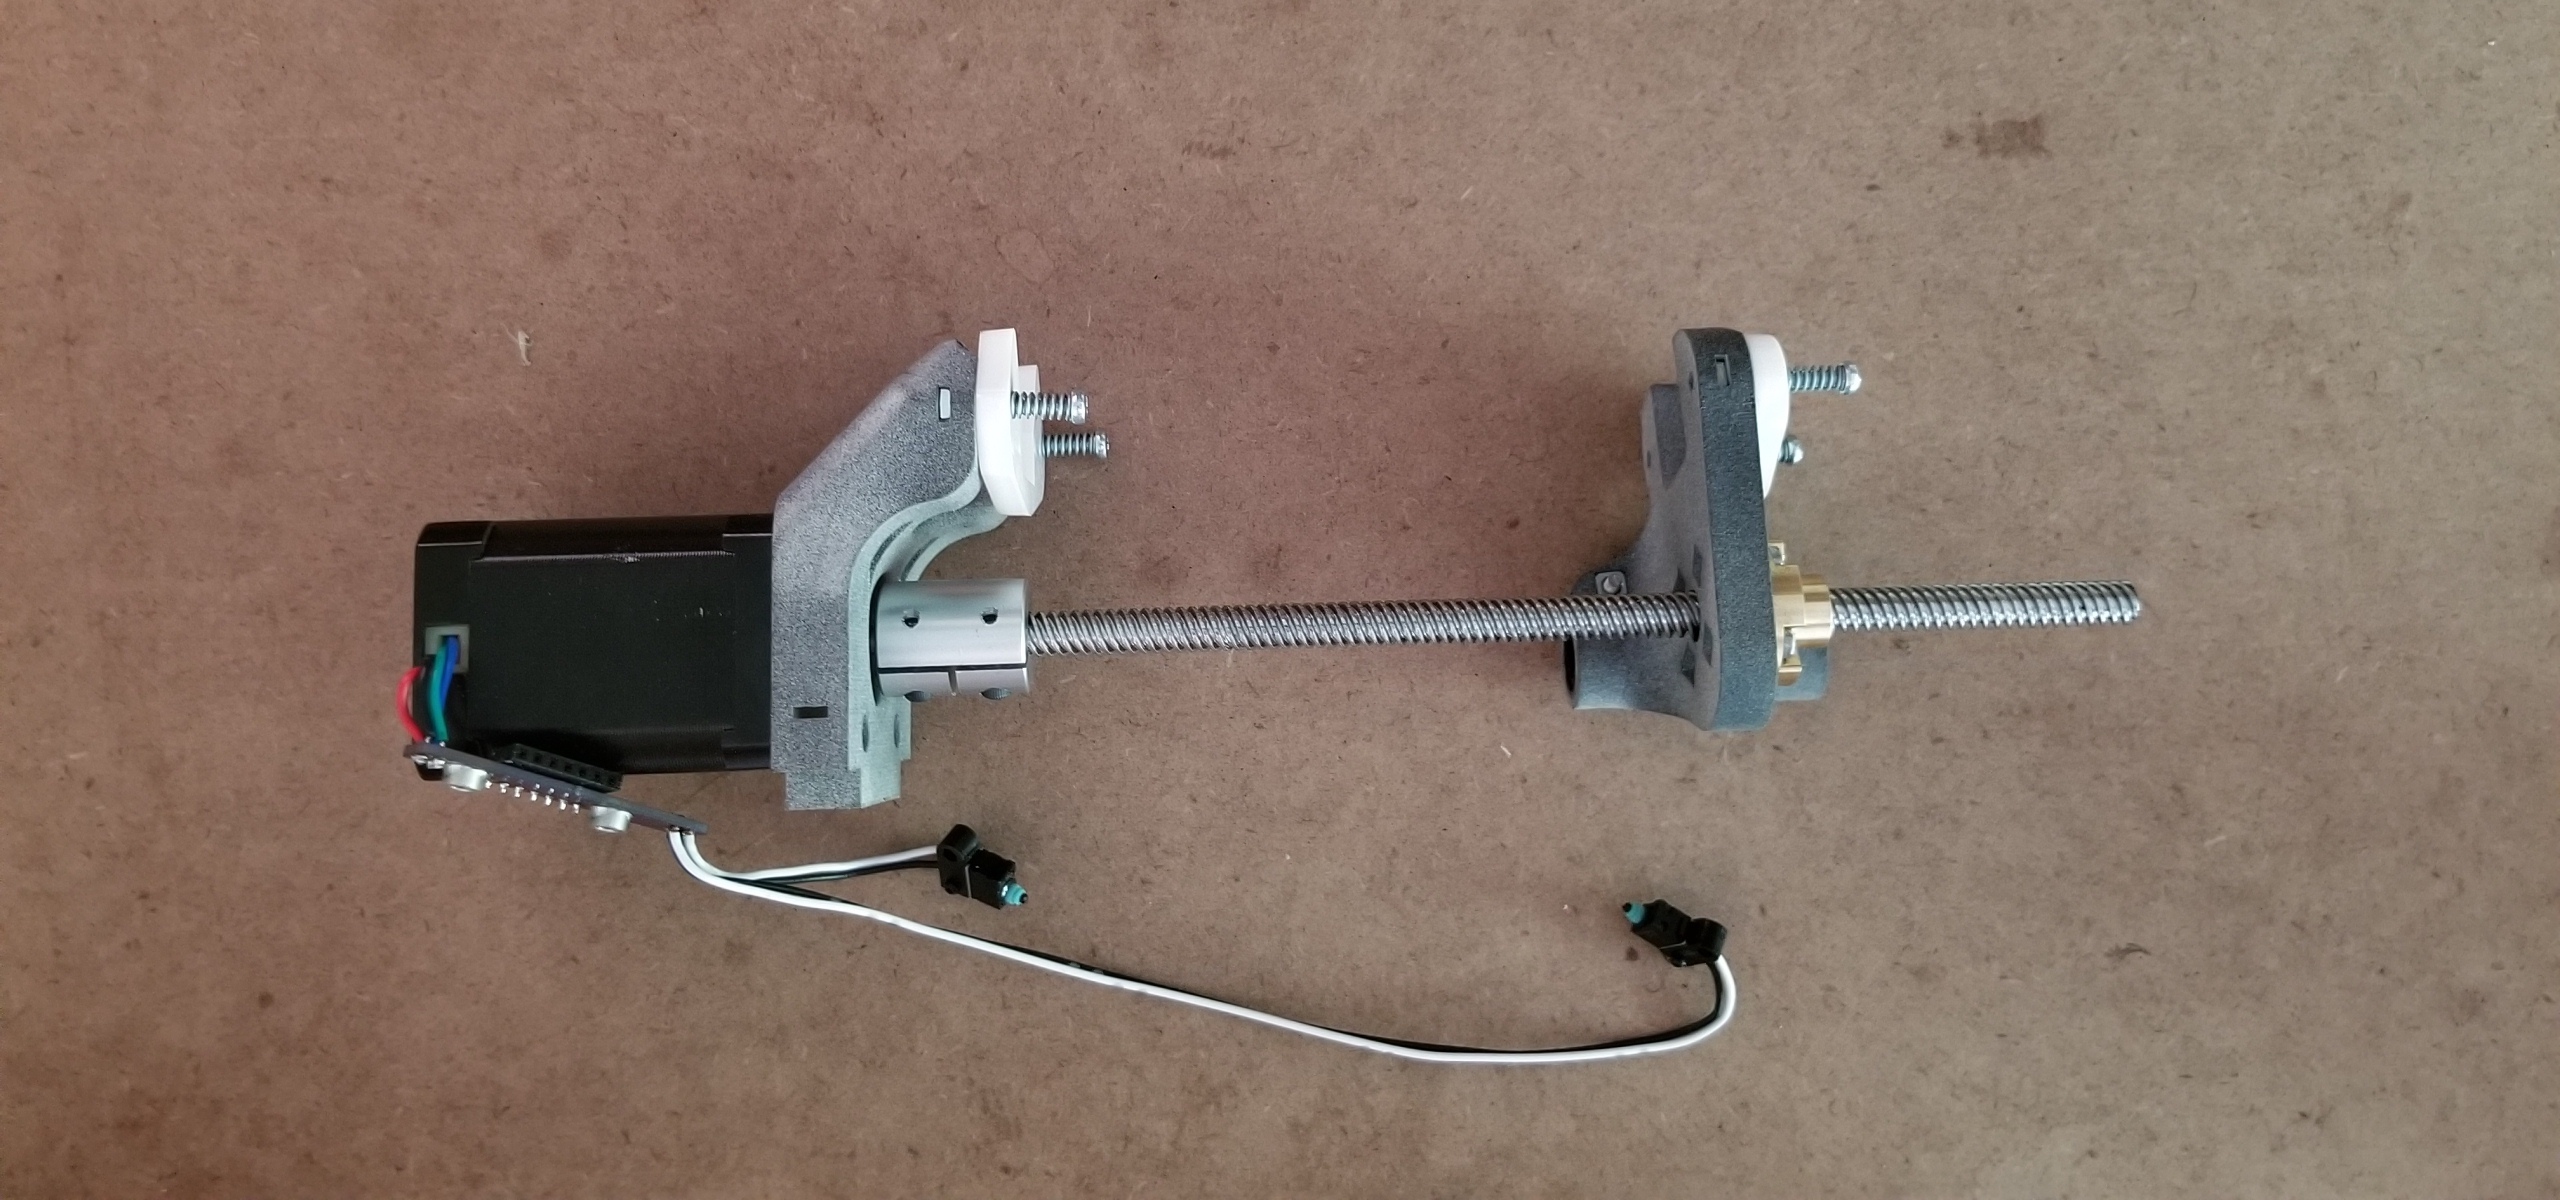
2. Mount motor to cradle and attach coupler#
- (4) M3x10mm screws
- (1) 5mm to 8mm coupler
- (1) motor with limit switches
- (1) cradle assembly
3. Assemble carriage#
- (6) M3x10mm screws
- (2) M3x25mm screws
- (2) springs
- (8) square nuts
- (1) lead nut
- (1) linear bearing
- (1) laser cut acrylic clamp
- (1) 3d printed nylon carriage


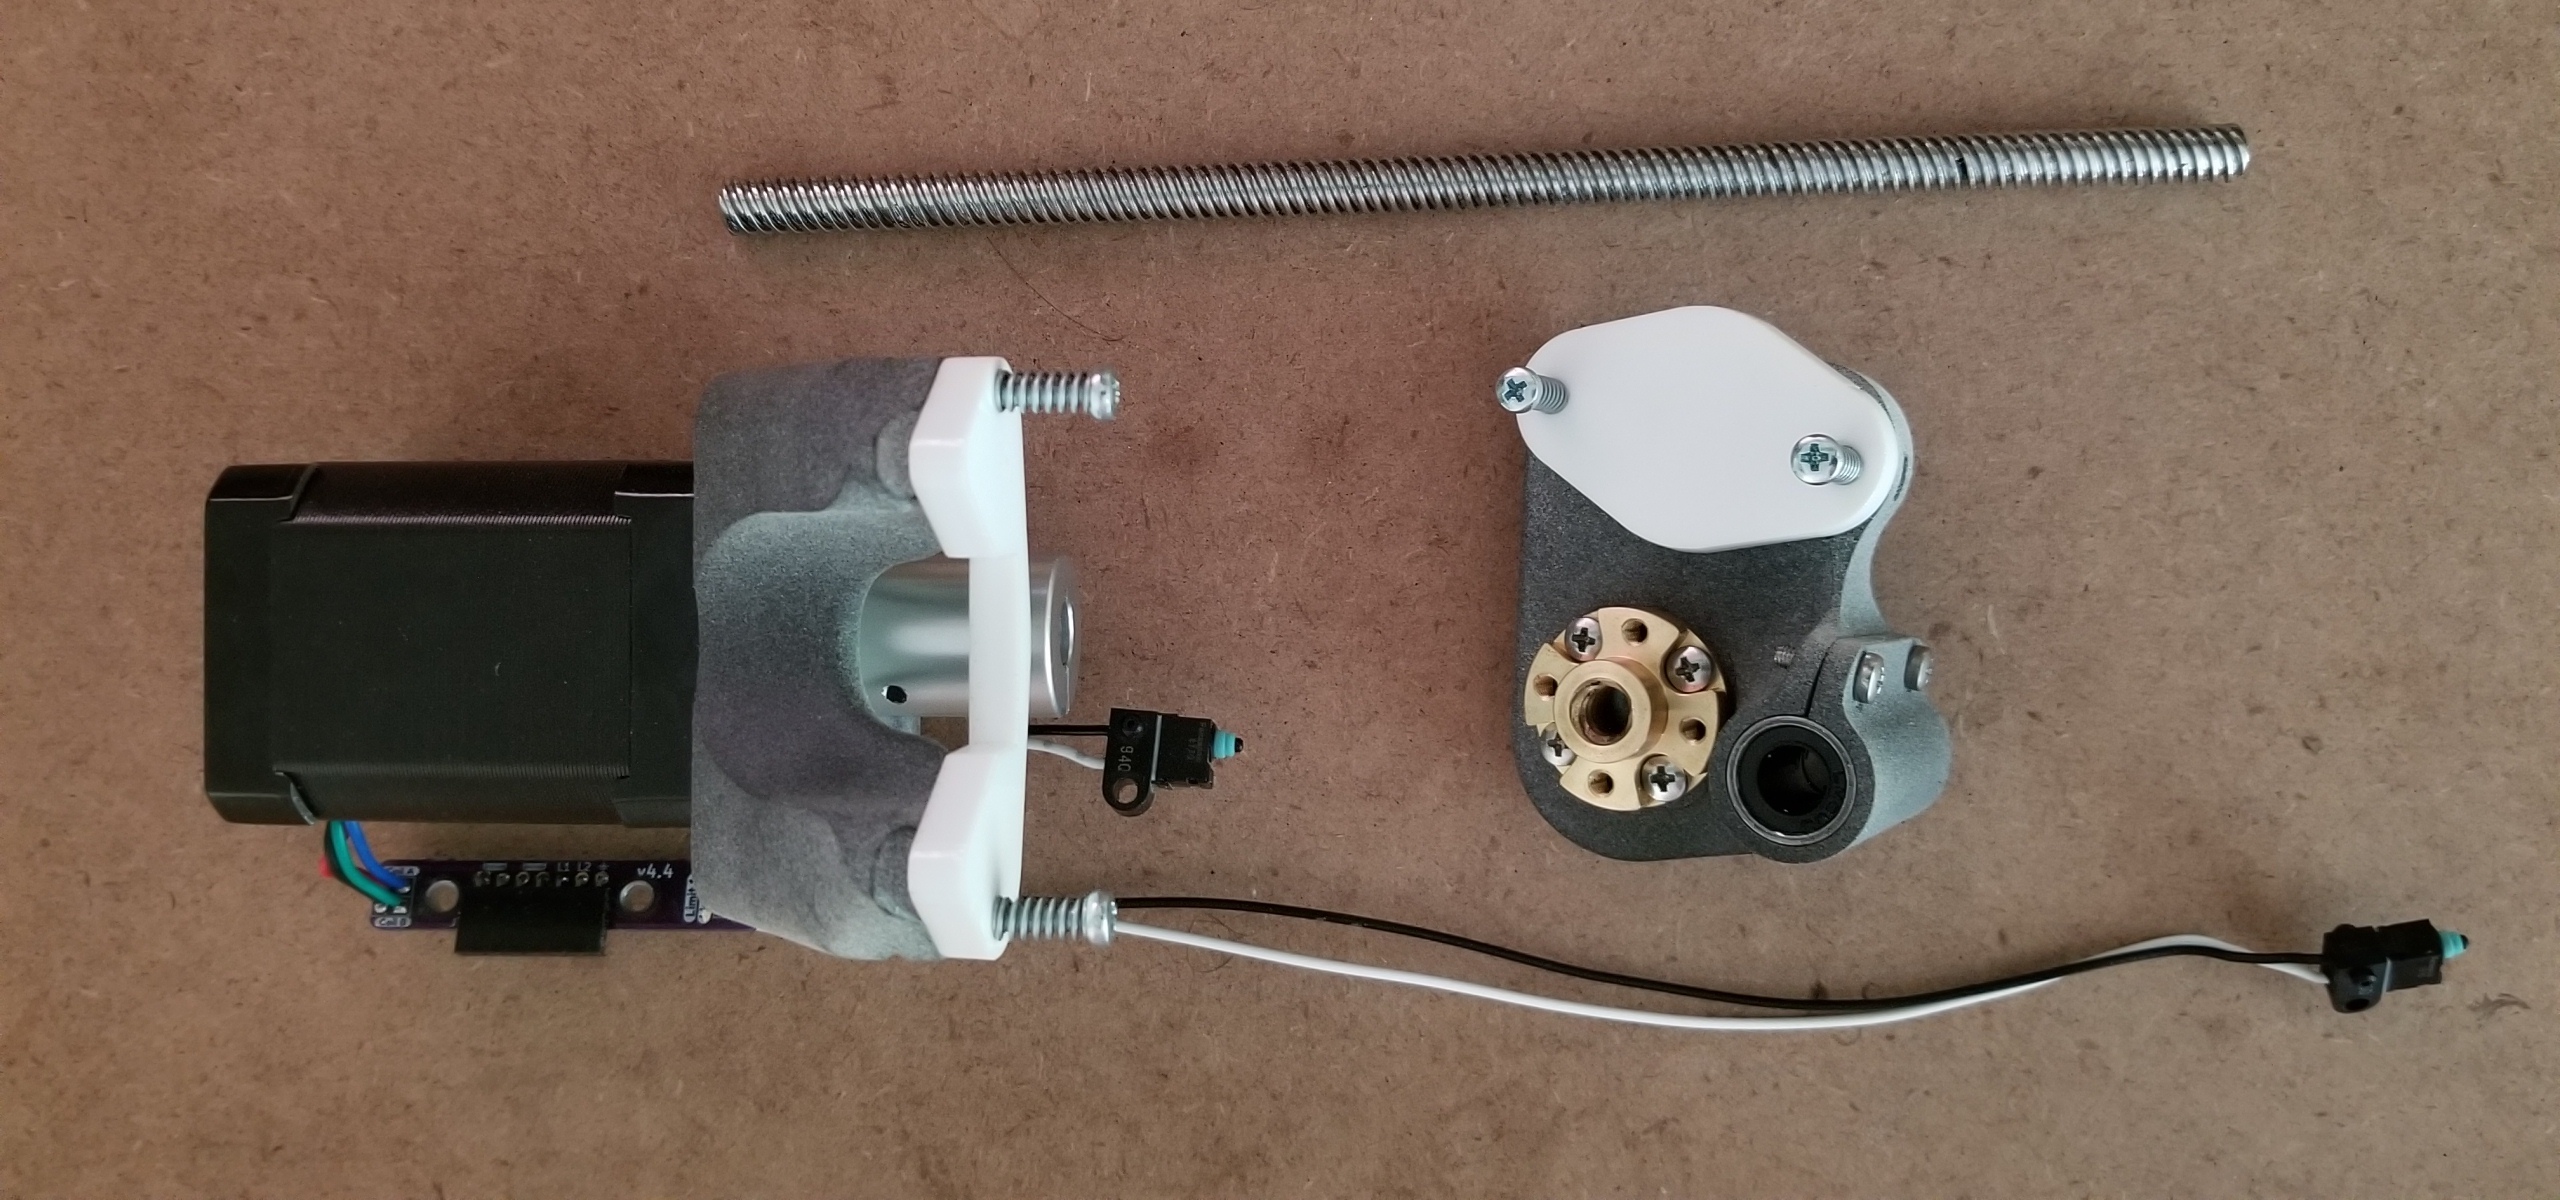
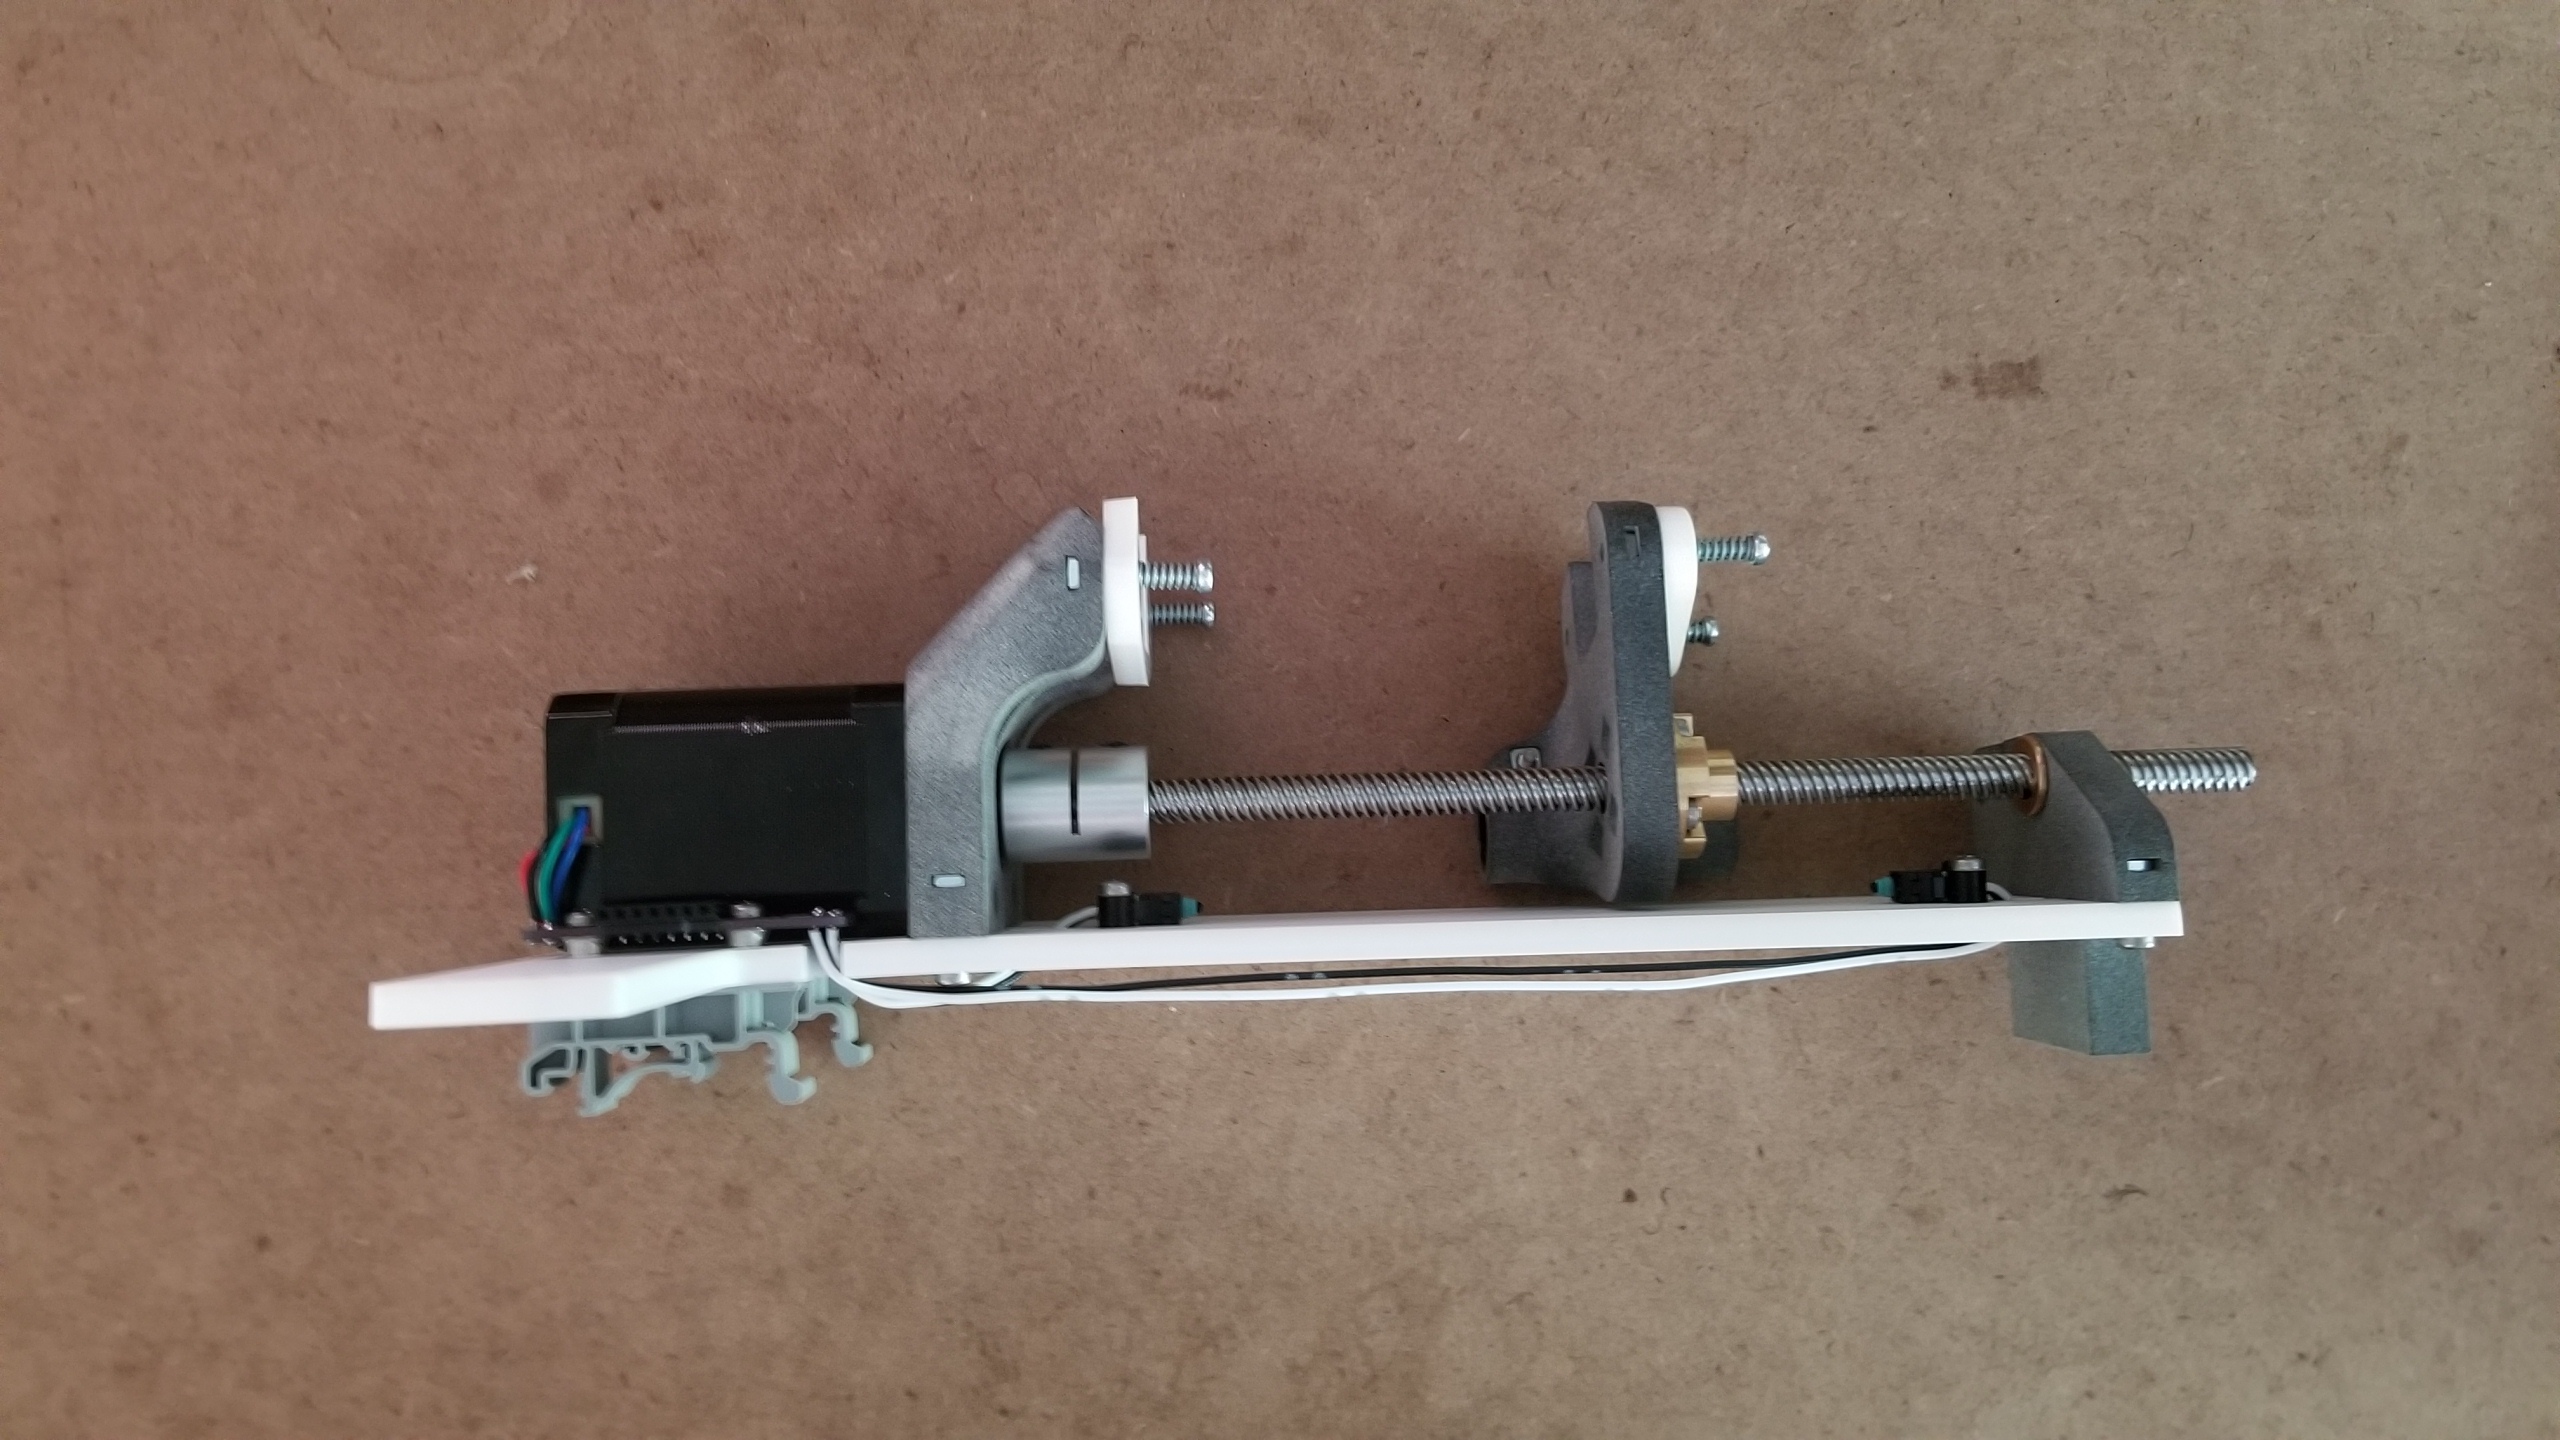
4. Connect carriage to motor#
- (1) lead screw
- (1) motor/cradle assembly
- (1) carriage assembly
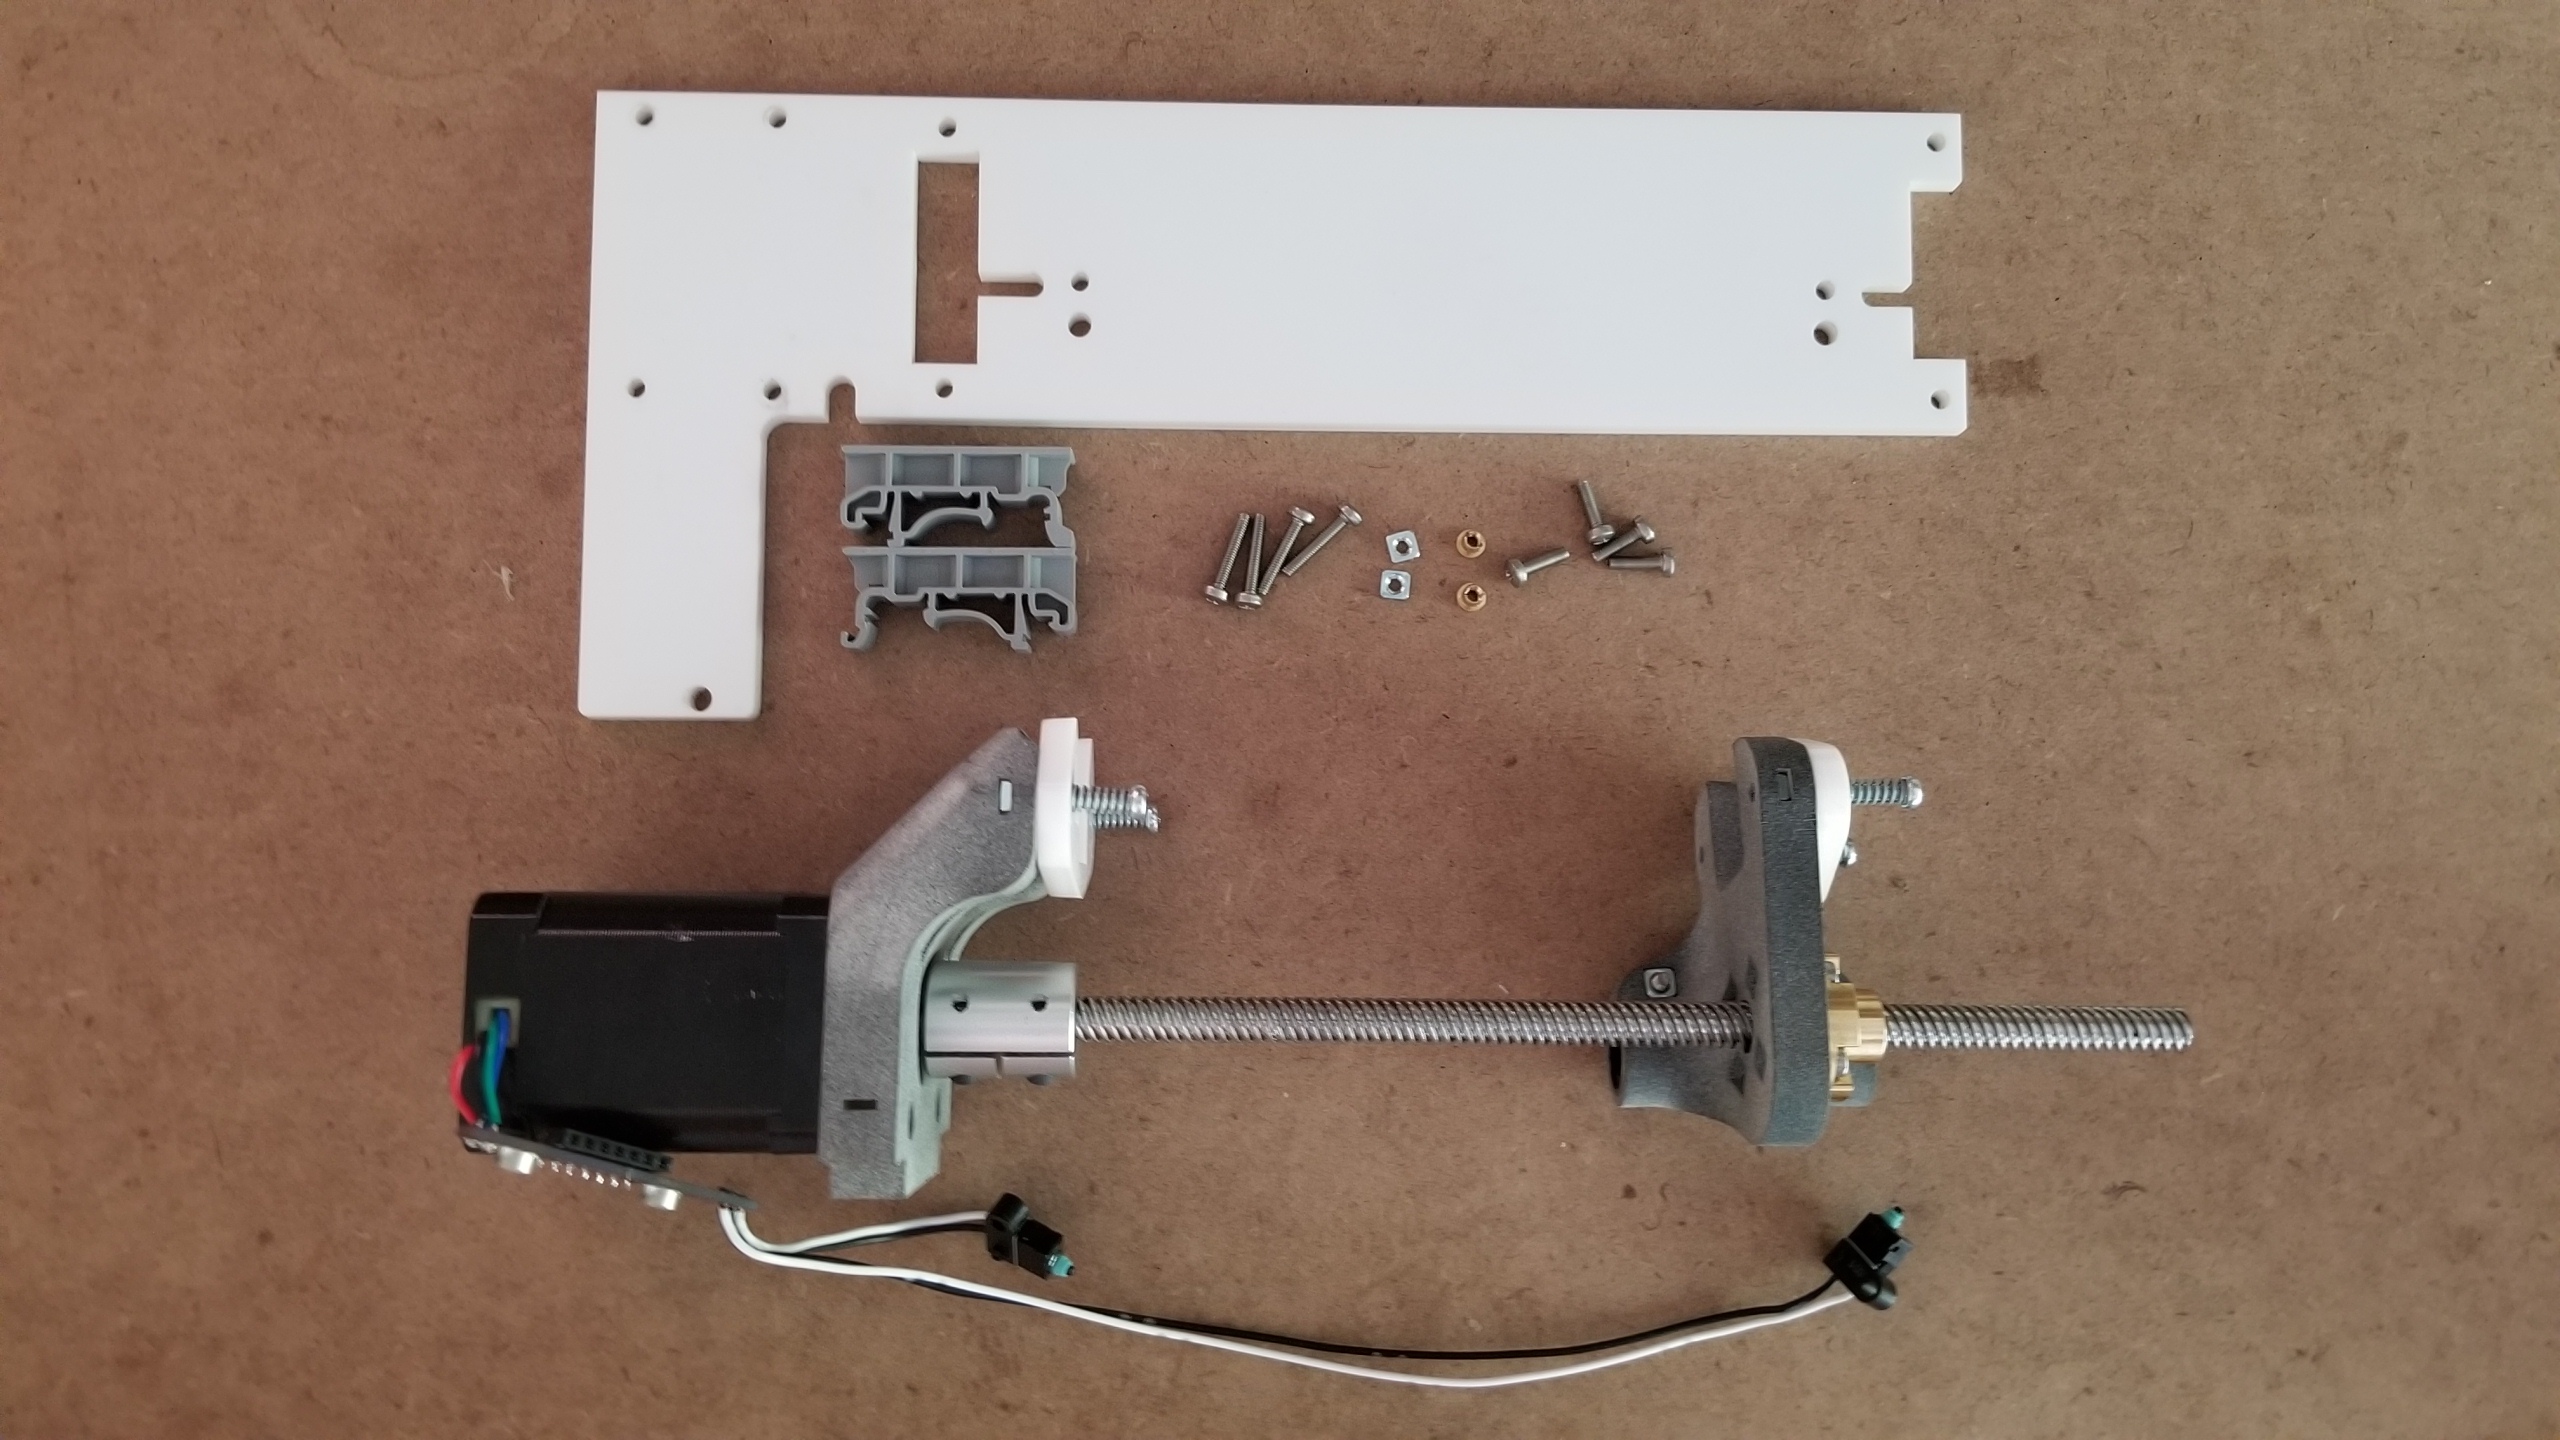
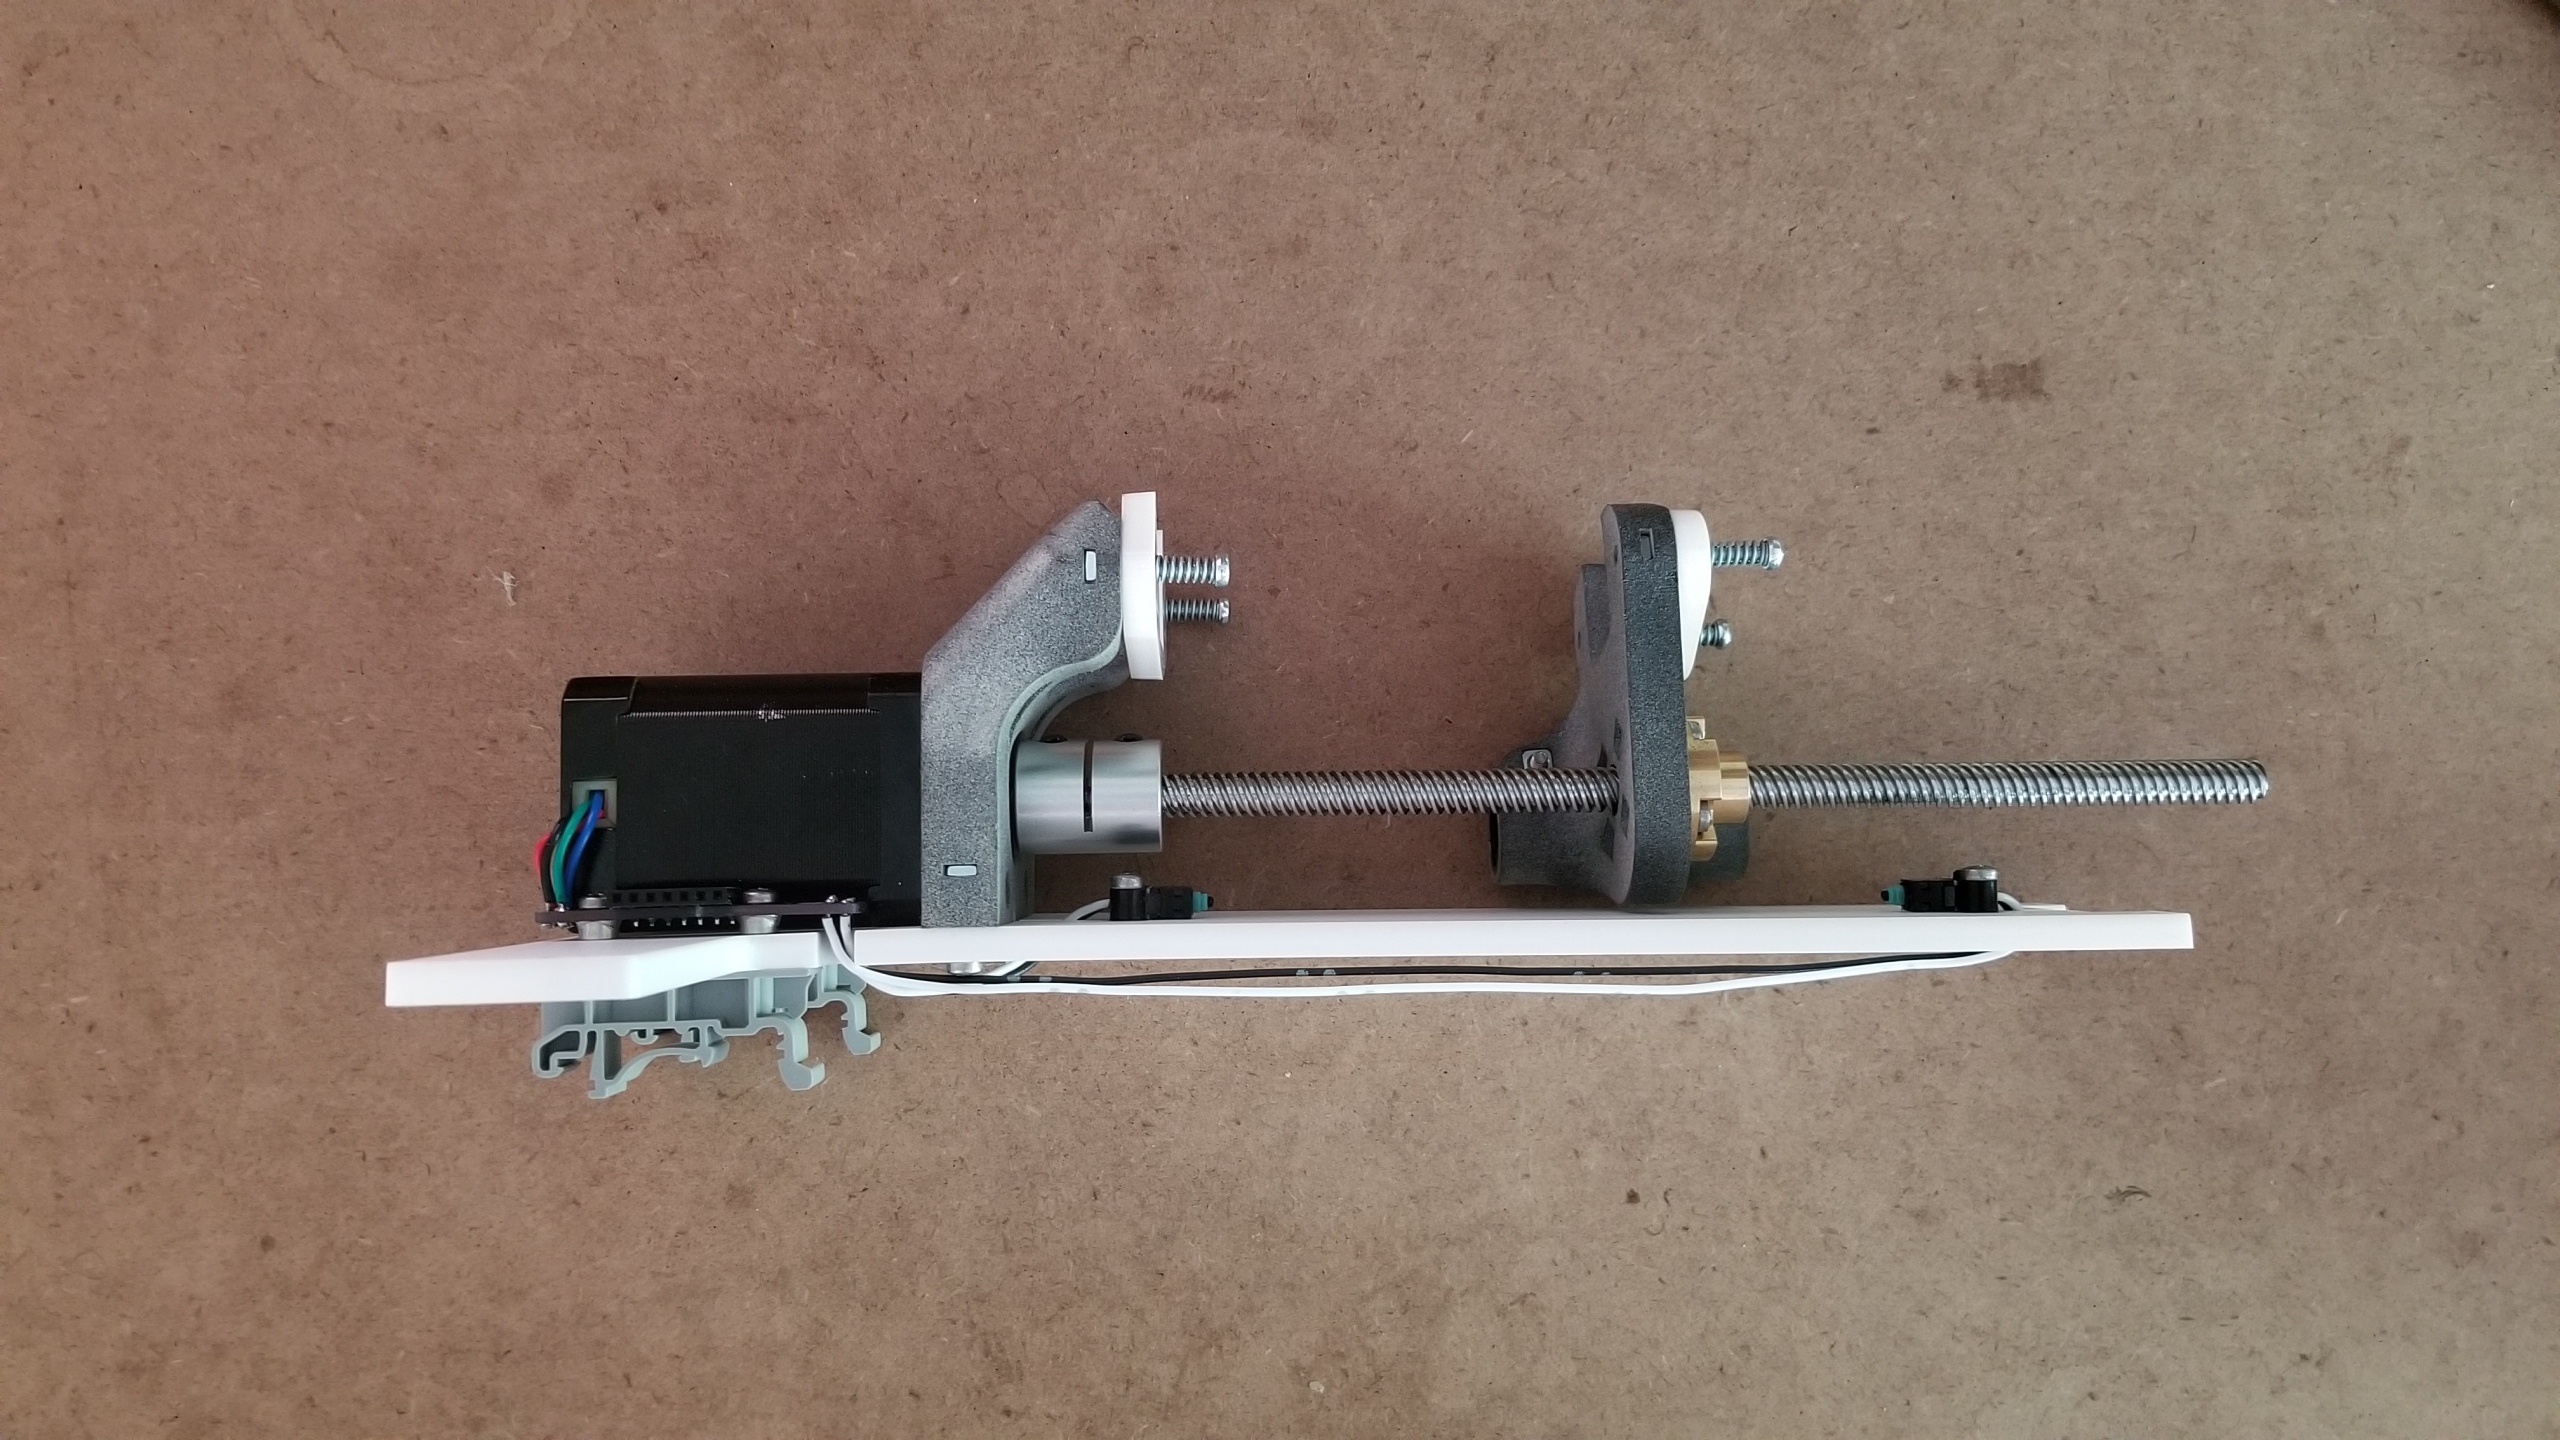
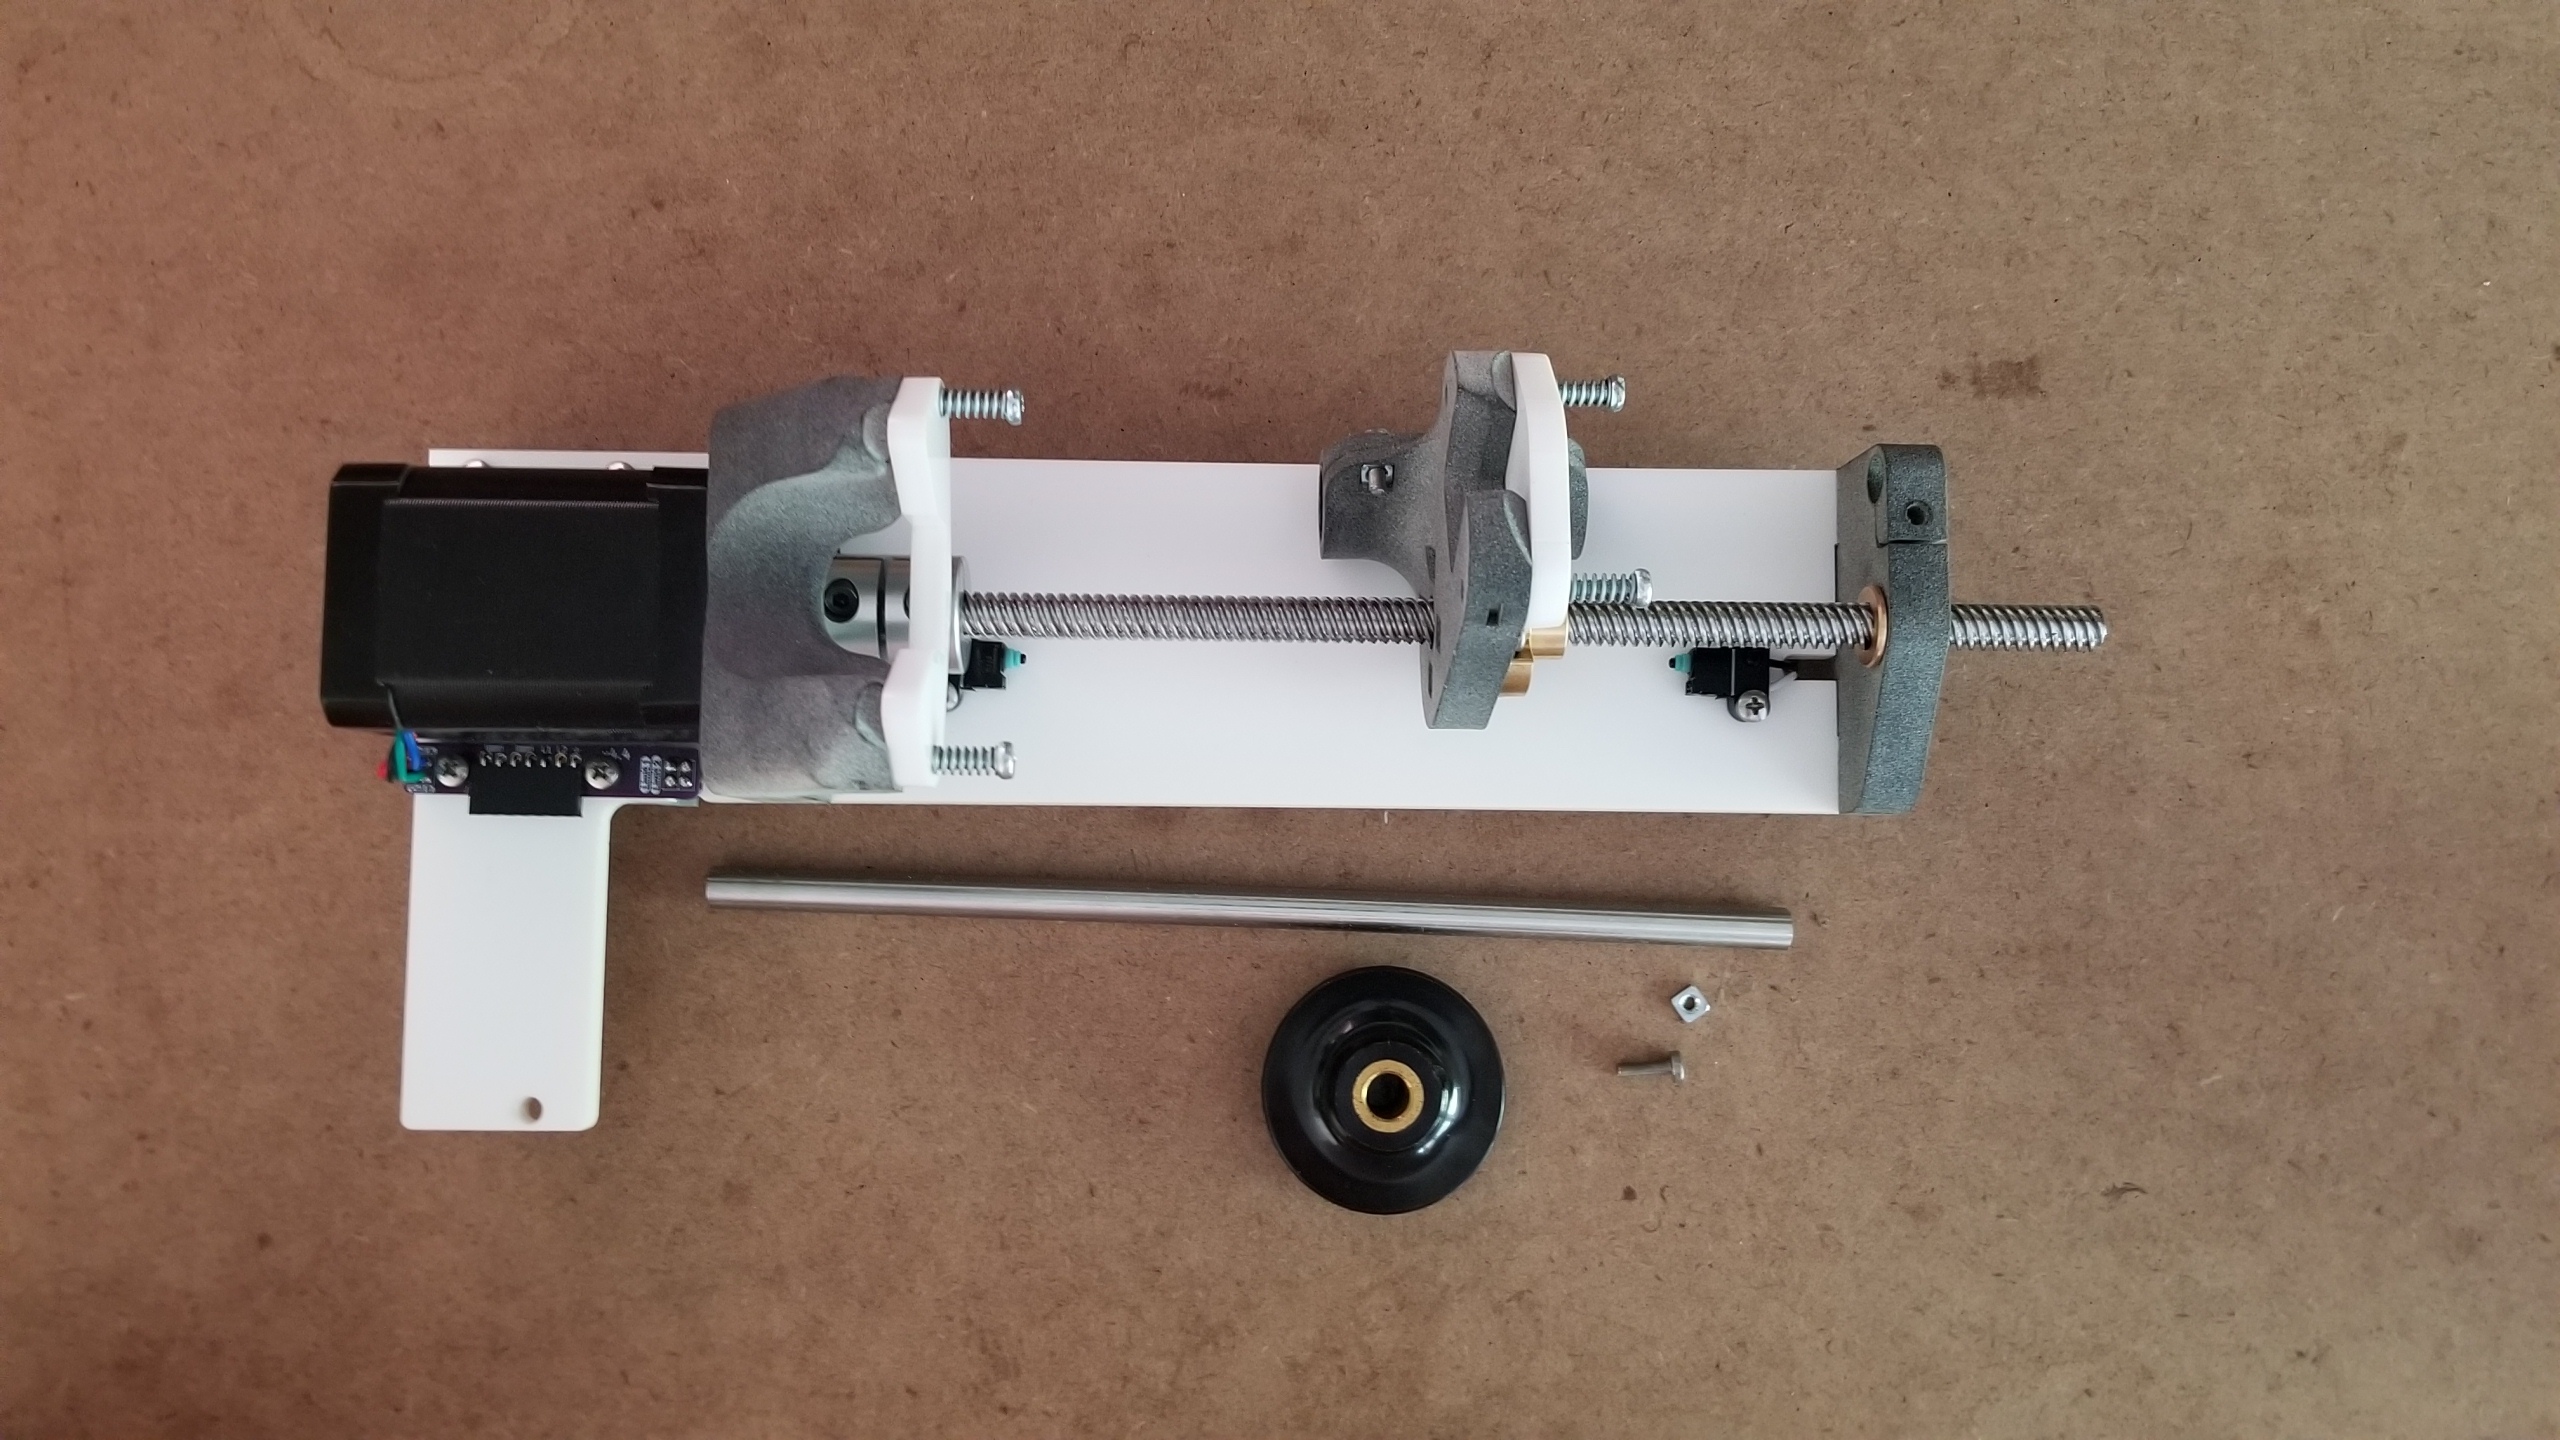
5. Attach baseplate#
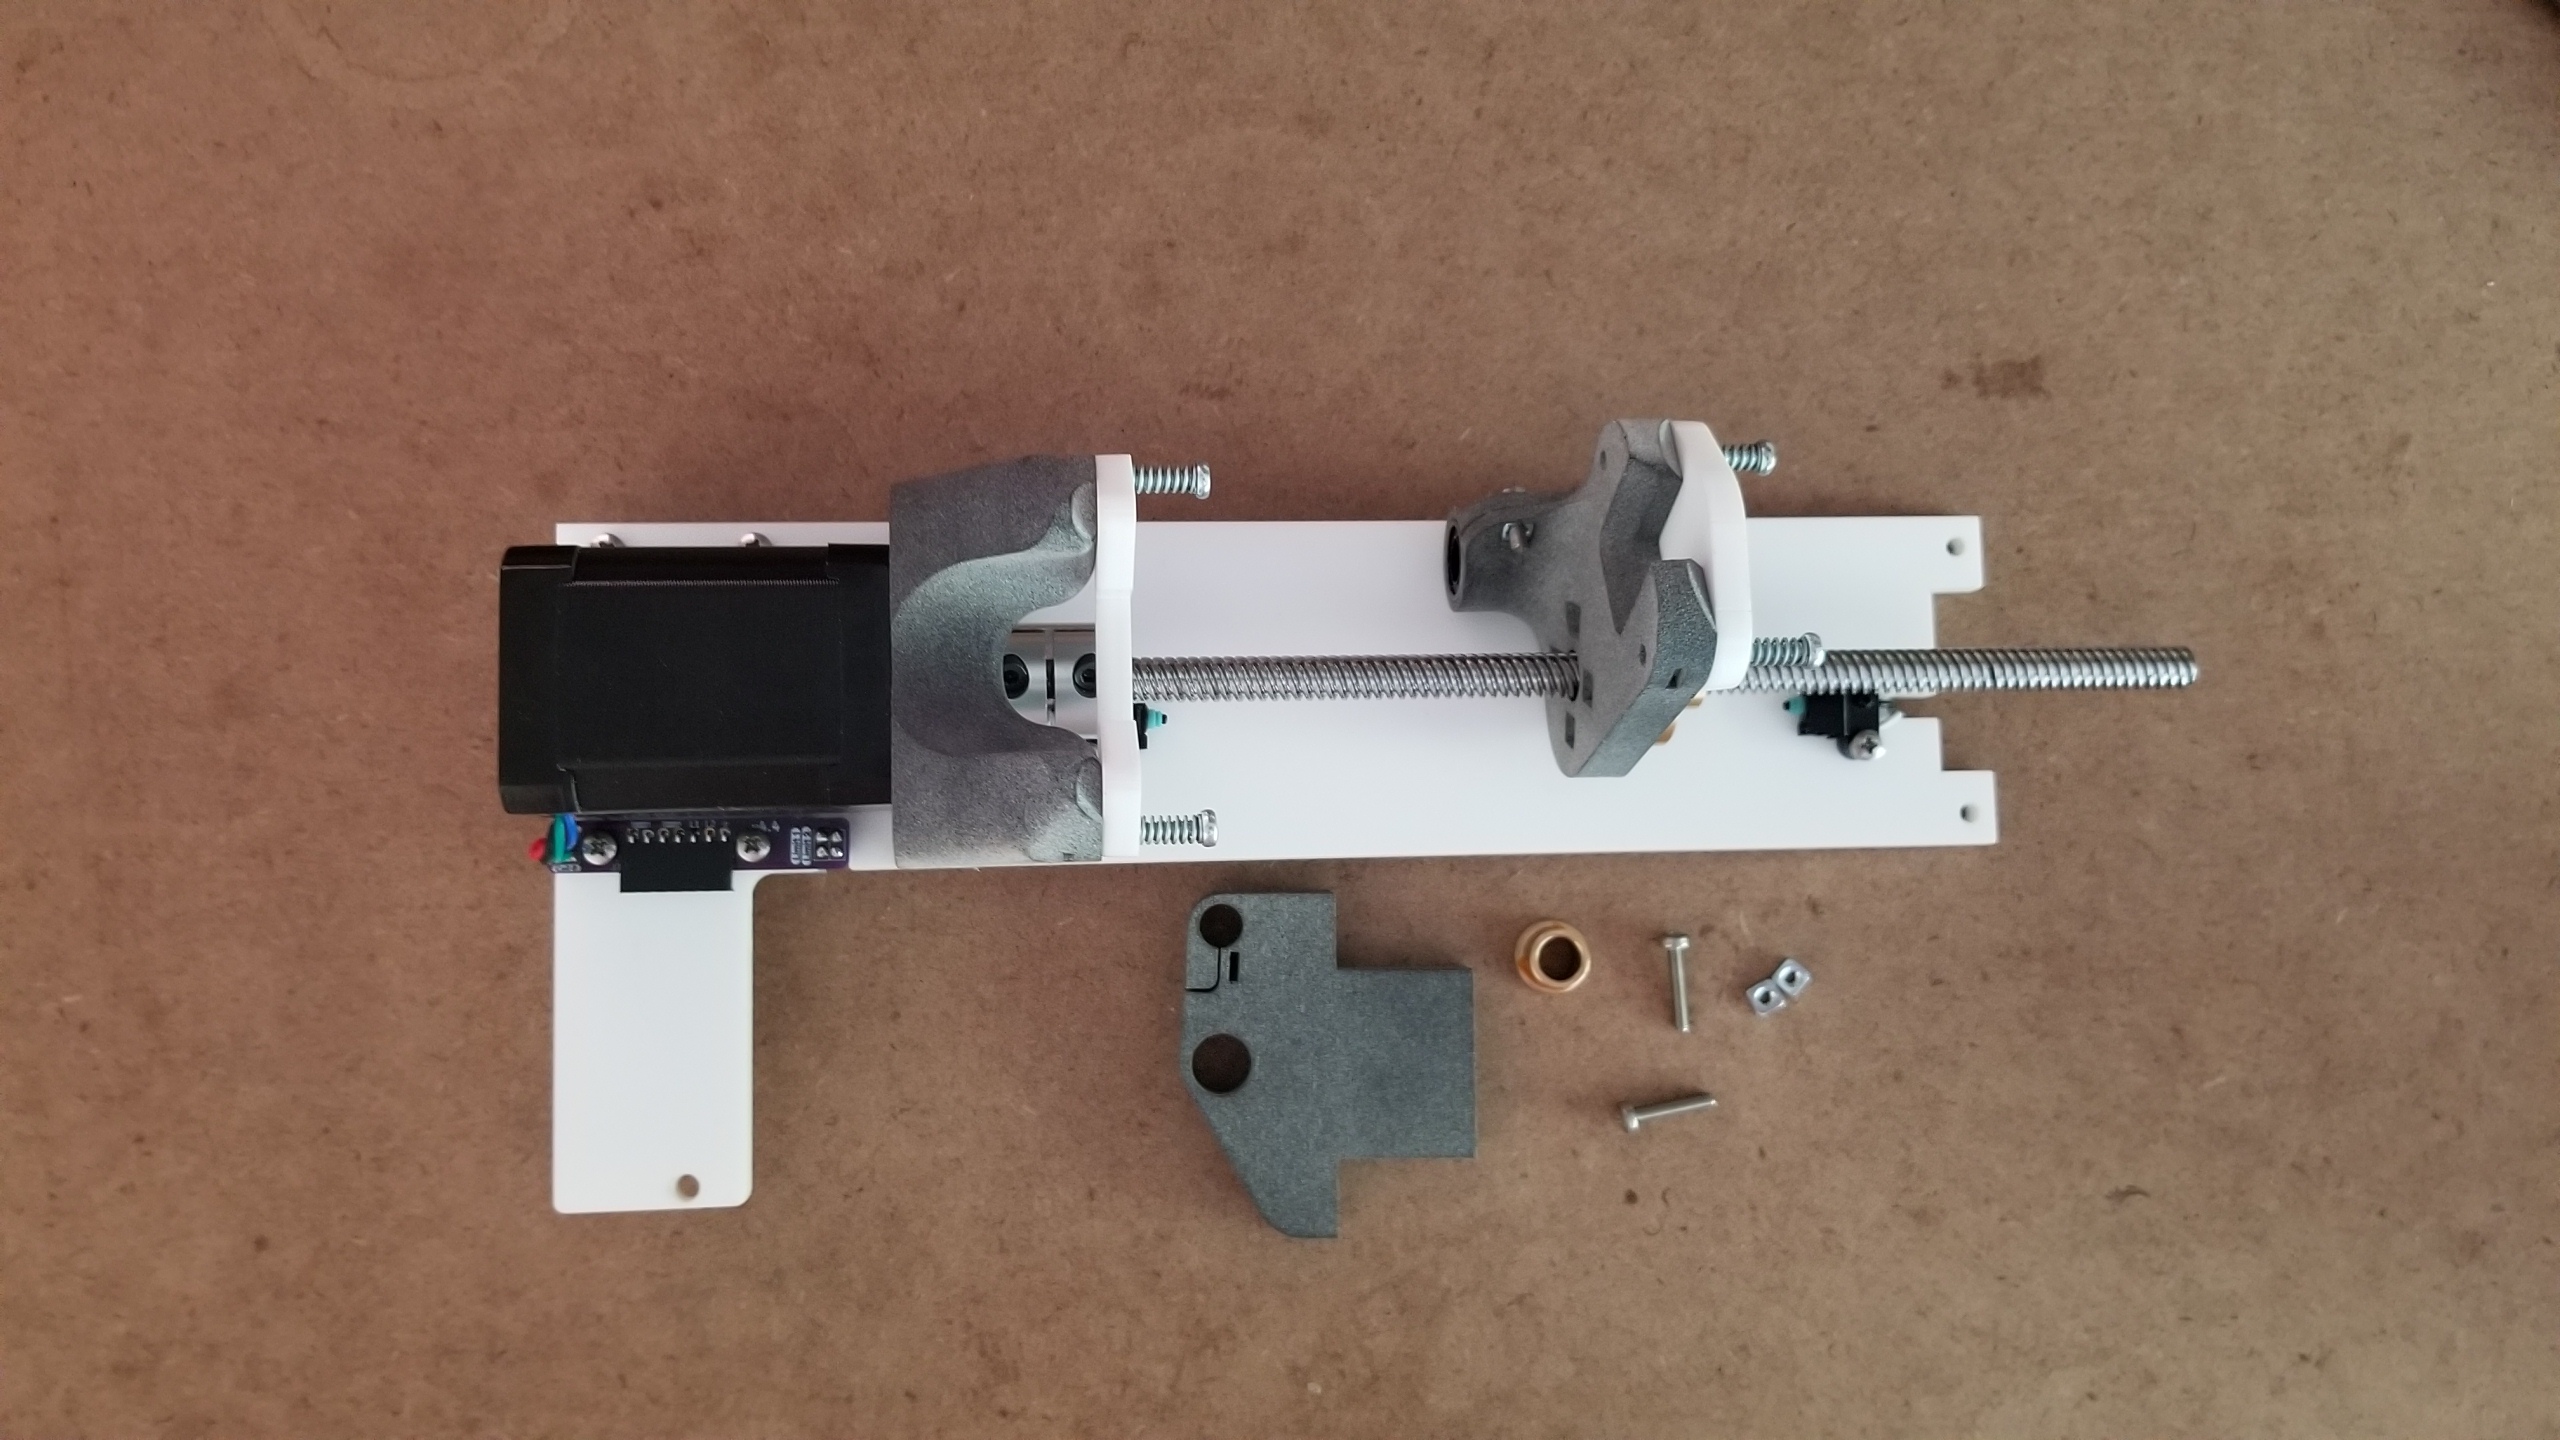
6. Attach end support#
- (1) flanged sleeve bearing
- (1) 3d printed nylon end support
- (2) M3 x 16mm screws
- (2) square nuts
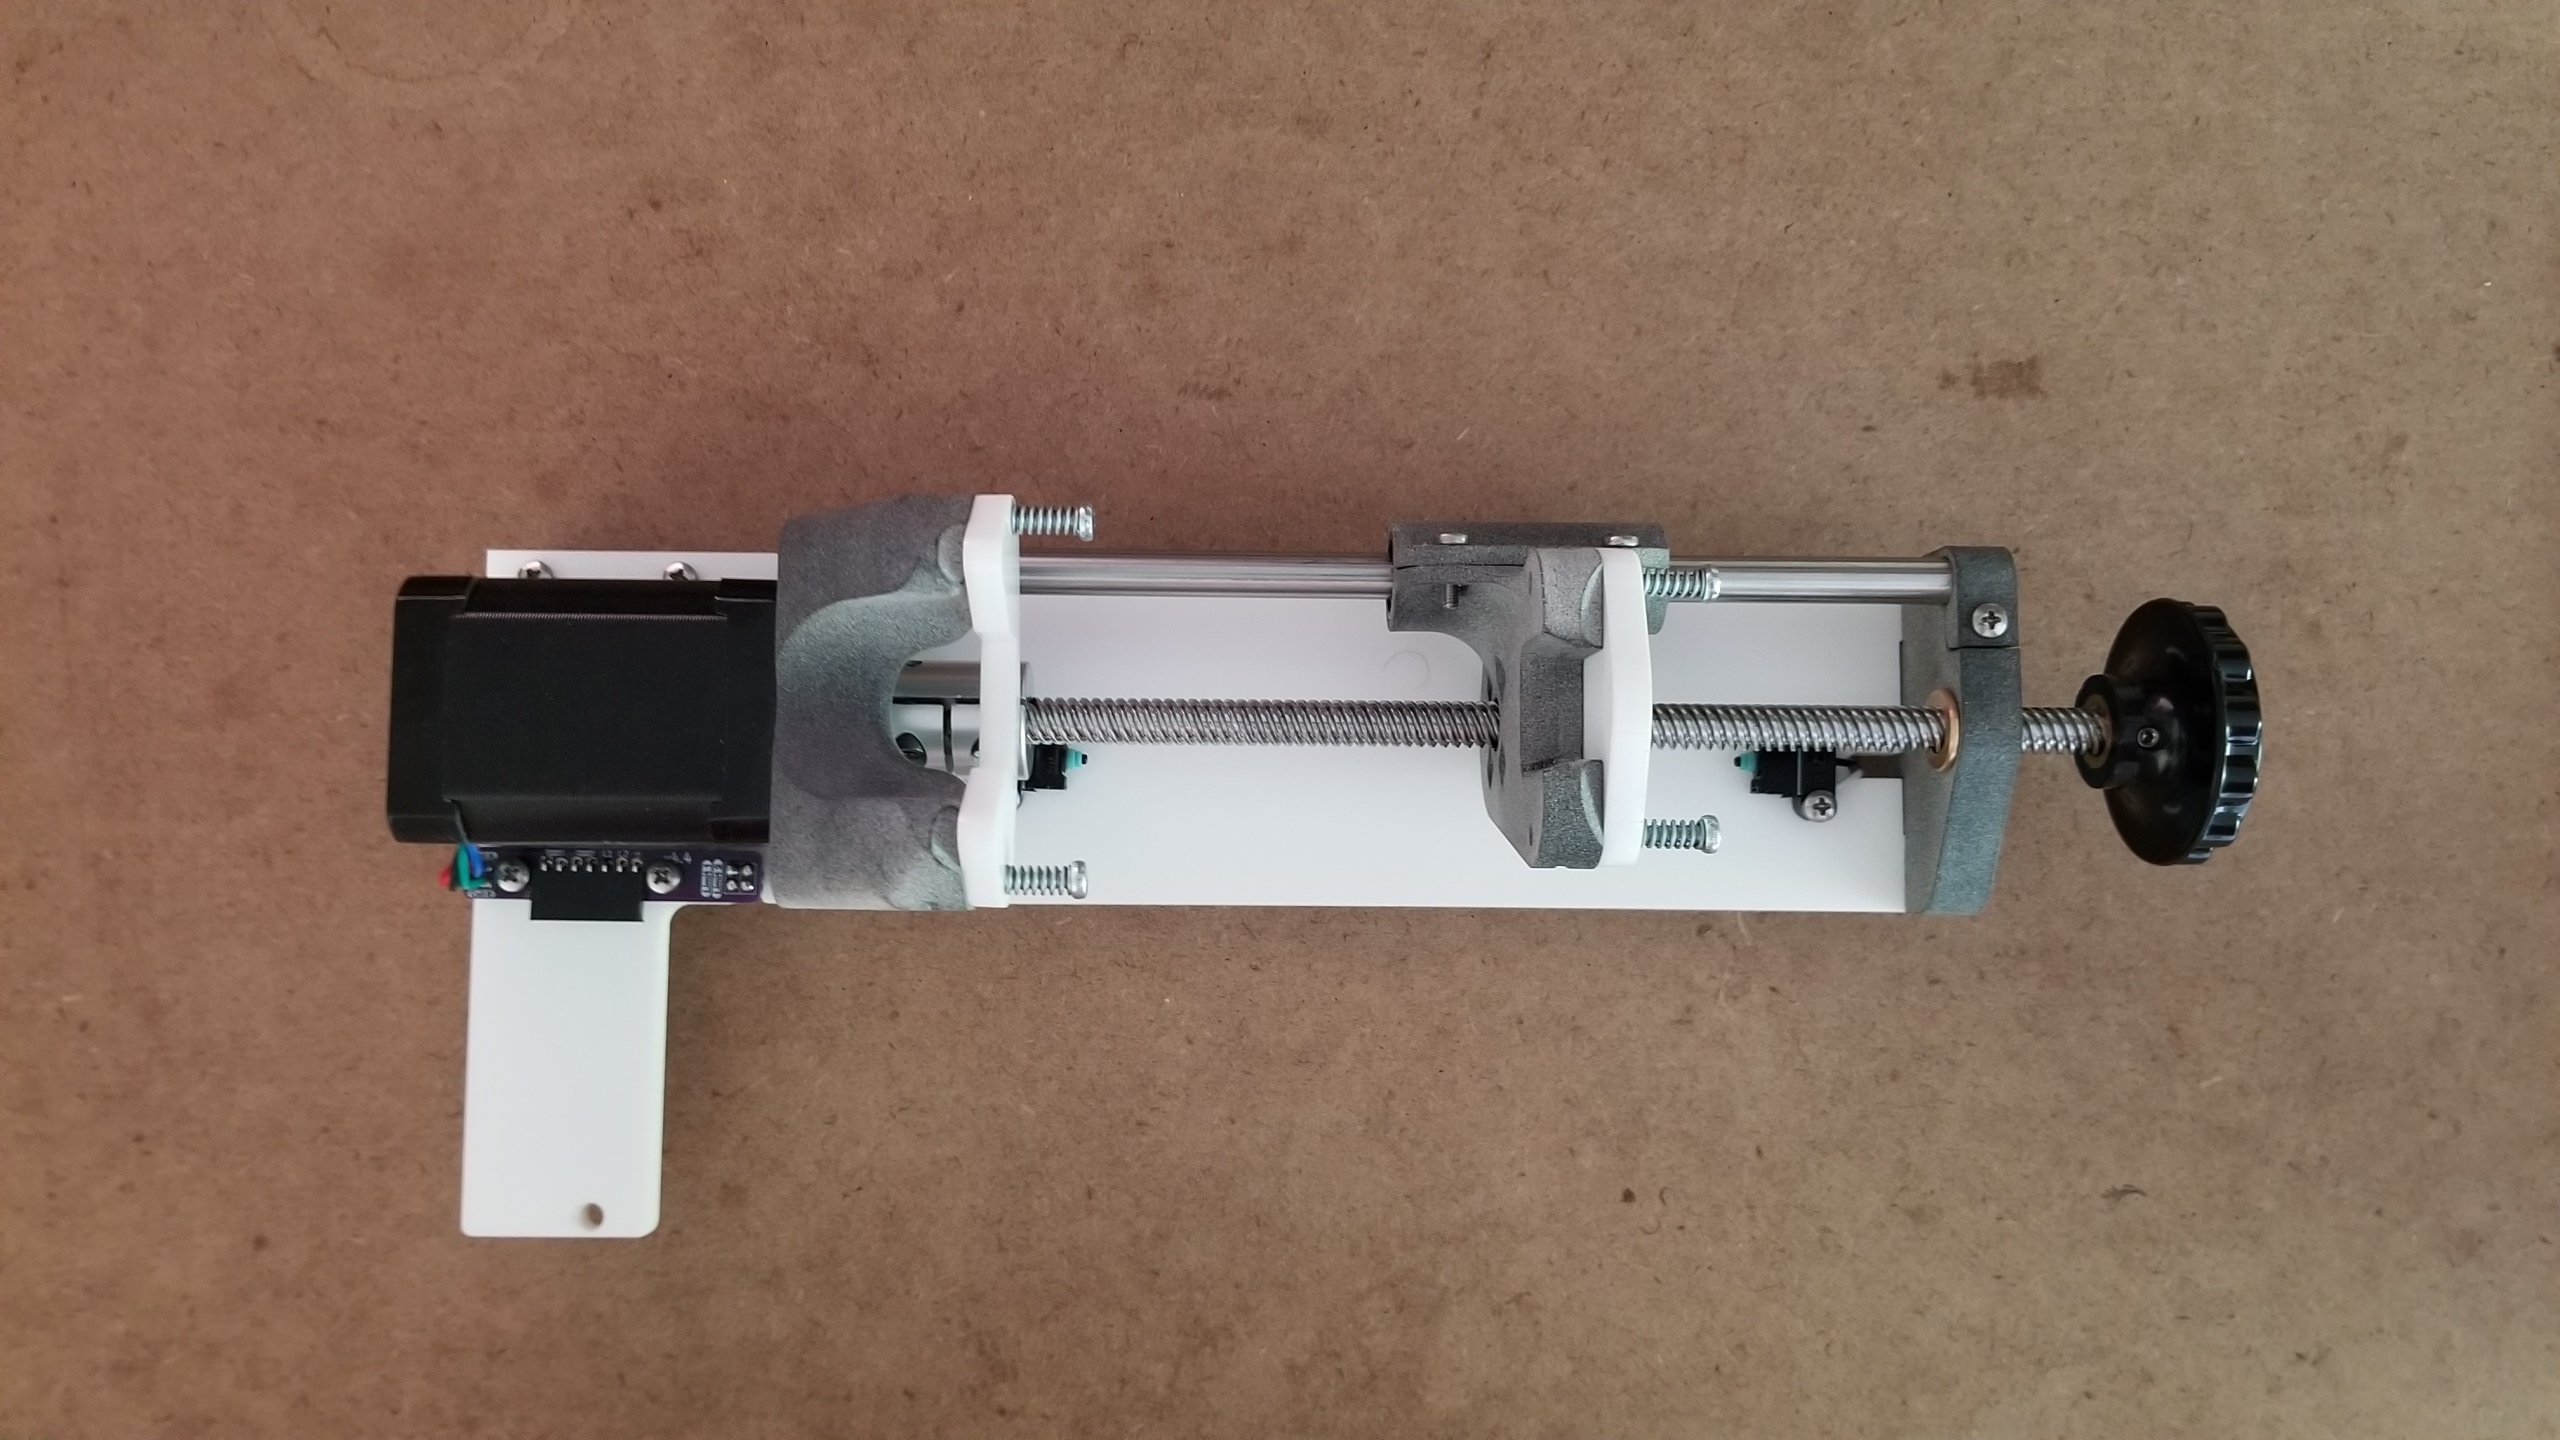
7. Add knob and support shaft#
- (1) M3 x 10mm screw
- (1) square nut
- (1) support shaft
- (1) knob
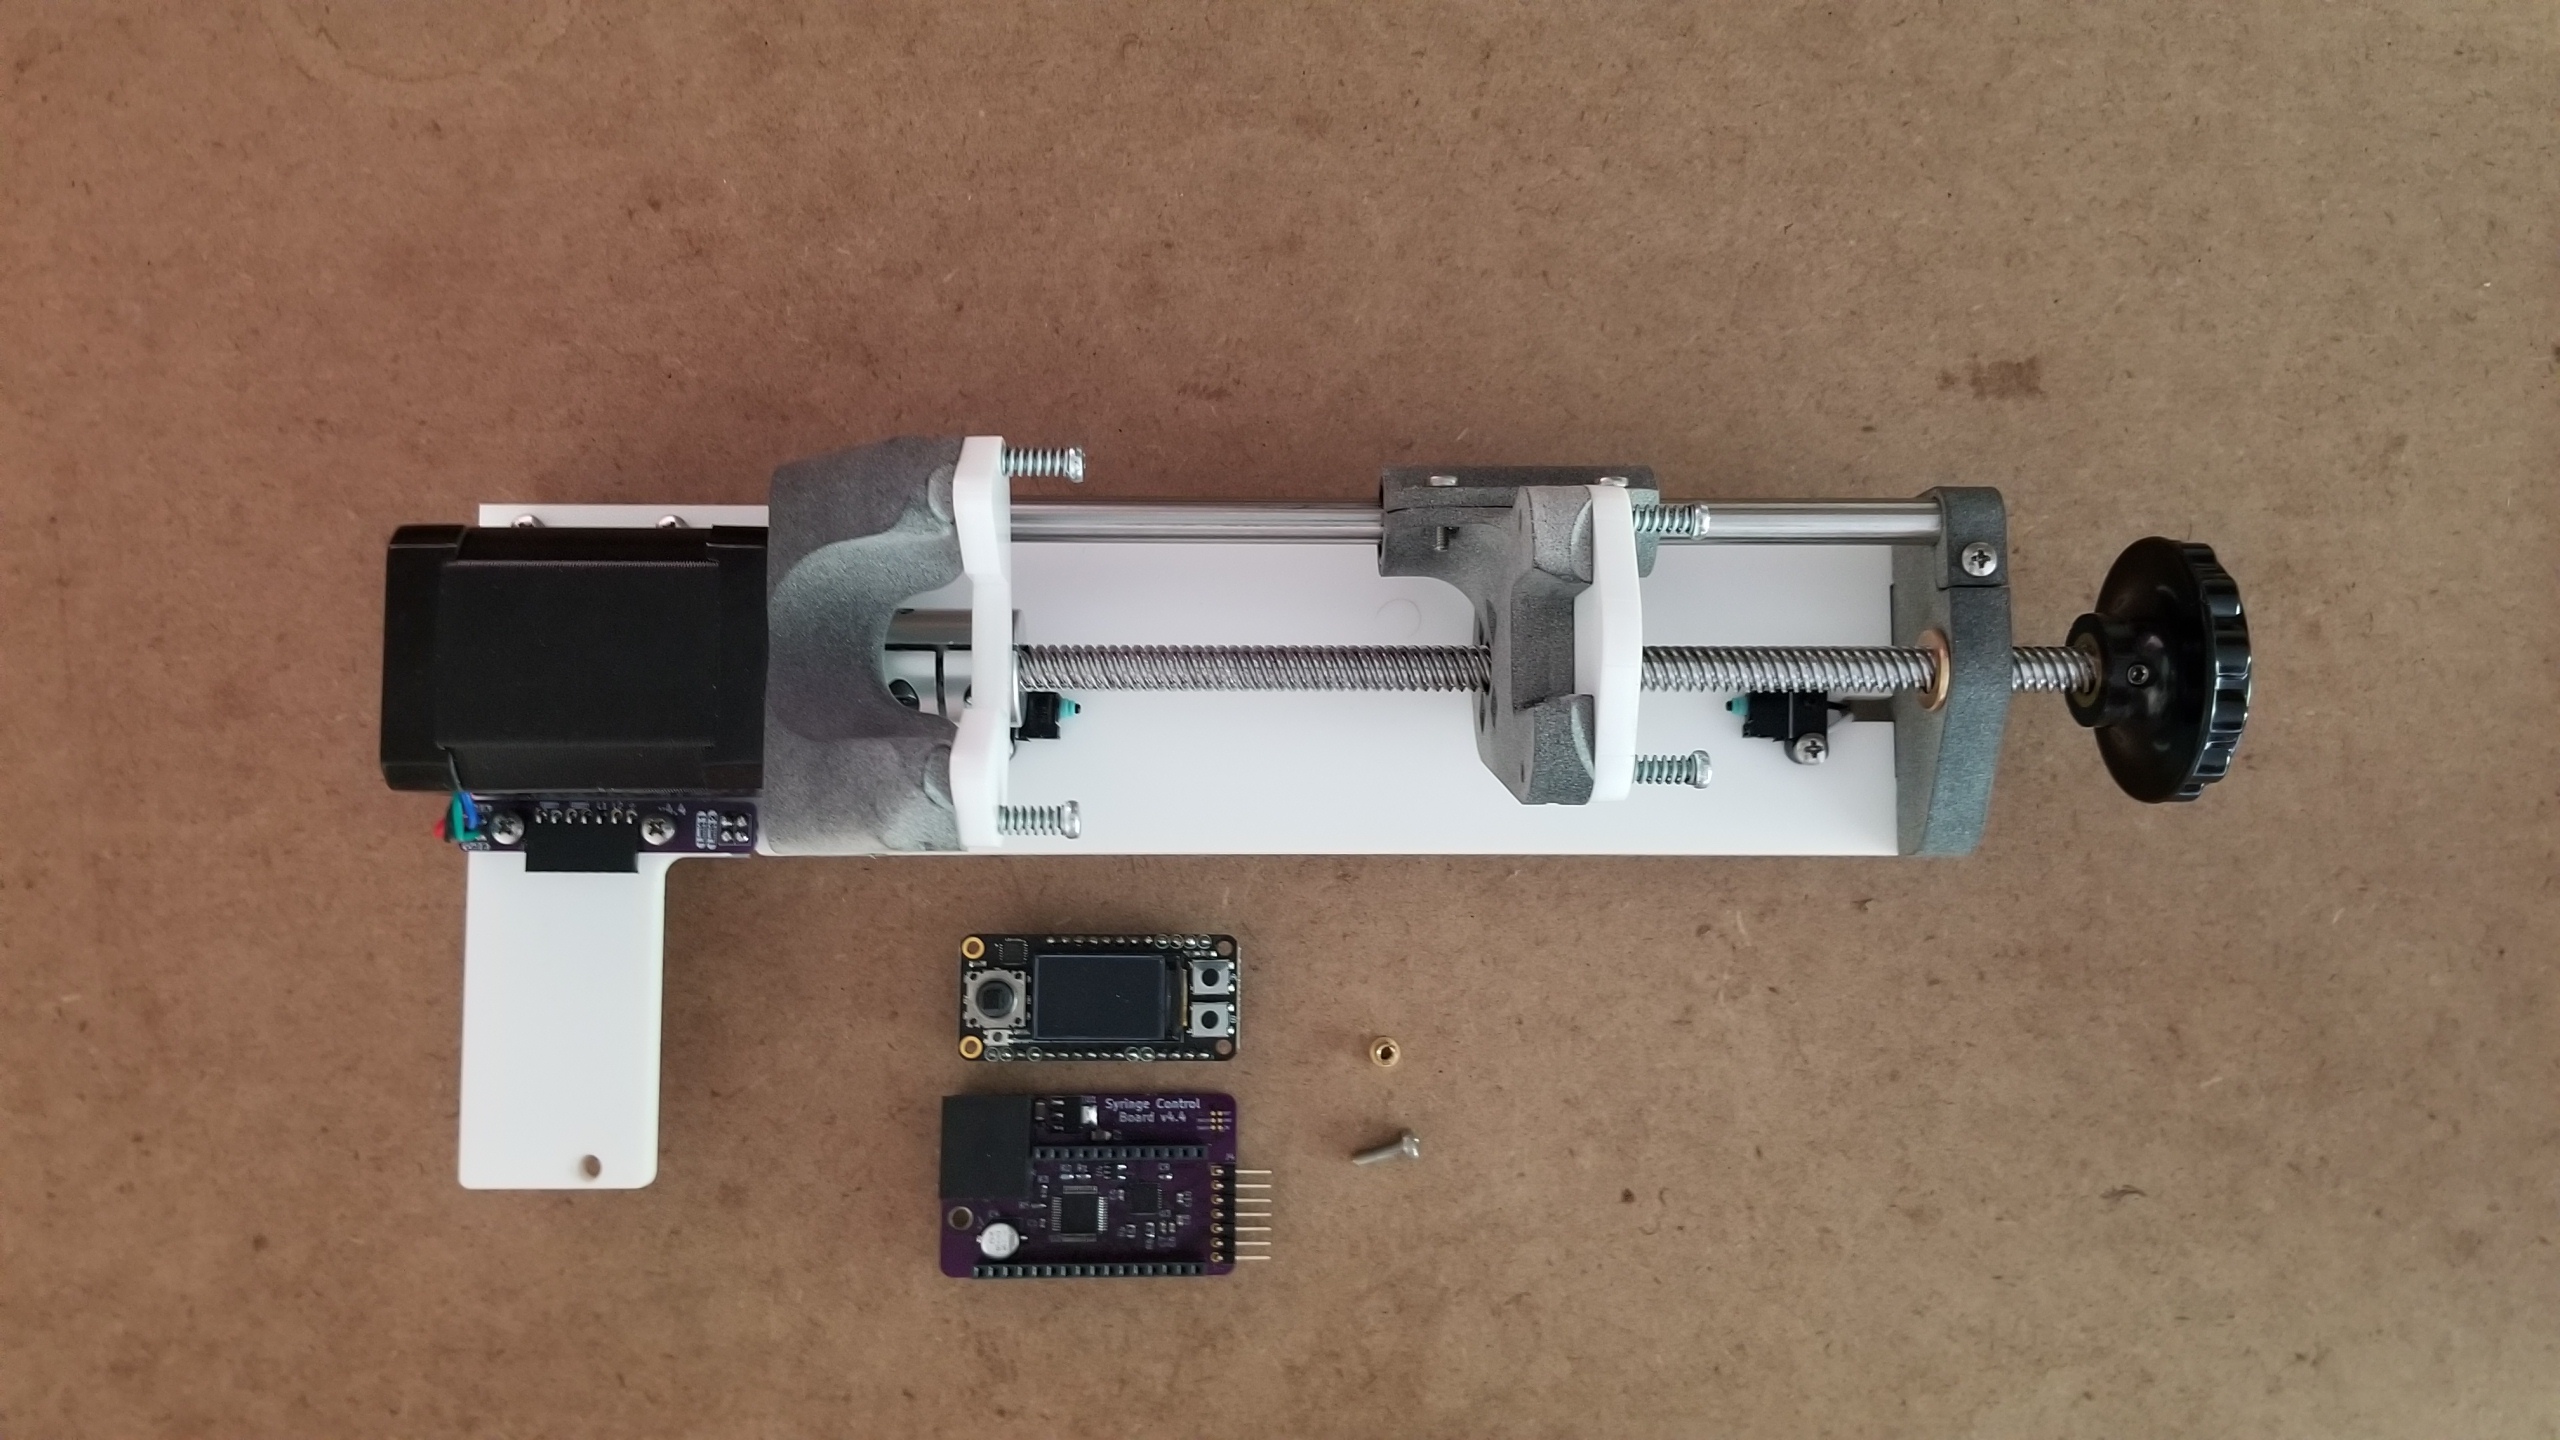
8. Add control electronics#
- (1) M3 x 10mm screw
- (1) M3 threaded insert
- (1) Syringe Control Board
Last update:
October 4, 2023